There are a variety of ways you can photograph the stars and the night sky and each will depend your intended outcome.
For example the techniques used in photographing the Milky Way galaxy are different to those used to photograph star trails. Likewise a night sky filled with stars over an urban environment needs a different technique to one that is taken out in a dark and remote landscape.
All will be affected by the phase of the moon.
Contents
You Will Need
For night-sky photography you will need some basic essentials.
- A camera that can take long exposures
- A solid tripod
- A fully charged battery and a spare. You don’t want to be stuck in the middle of nowhere only to find your battery is dead. They die faster in cold weather and when using long exposures and your LCD screen a lot.
- A remote control shutter release or camera with a timer
- A wide angle lens, preferably one with at least an f2.8 – see below.
While a wide angle lens is not absolutely essential, you could after all take a series of shots in vertical or horizontal panoramas and stitch them together in post processing, it does make life a lot easier. This is especially so where long exposures are concerned. Take a few photos and you will soon realise how fast stars actually move.
“Why do you need an f2.8, with it’s shallow depth of field, when you are trying to photograph something that is thousands of miles away?”
This was the first question that came to mind when I first started looking into star photography years ago. I thought that the shallow depth of field would give me a very much out of focus image. However the depth of field is determined by the hyper focal length of the lens and at infinity you have nothing to worry about – your stars will all be in focus.
In most situations you will find the following items pretty useful too.
- A buddy – it can get lonely out there and having a friend to assist with focusing and to compare shots with will make your experience that much better and memorable.
- A torch – you’re out at night so a torch is not only useful for finding your way around but will also be useful for a number of other things such as focusing and light painting
- A night sky app – I use Stellarium for Mobile which is dirt cheap and very good IMO. But there are a lot out there that you can try. The advantage of an app is it will tell you the best times for star photography from a given location as well as how to locate certain stars such as the Northern star or the milky way.
- Warm dry clothes that can keep out the wind; this includes a beanie, gloves and boots. The best night skies can be found on cold clear nights and there is nothing worse, for someone like me who doesn’t do well when my extremities are cold, than cold hands or feet.
Best Conditions for Night Sky Photography
The best conditions for star photography are cold, crisp and clear nights with no clouds (although clouds can certainly add interest to photos) and no moon, unless of course you want the moon to add interest to you photos or to act as a source of light to illuminate the foreground.
Unless you are taking a star shot over a city, town or home and actually want the lights in the photo, avoid light pollution created by artificial light.
Get as far away from cities as you can – 50 – 60 miles if possible. The bigger the city the greater the distance will need to be.
Dress warmly with extra warm gloves and a beanie – better to have them than to suffer. For star trails especially you may be out there for a long time.
How to Focus on Stars That Are Light Years Away
I’ve seen a thousand theories on focusing on stars and I am sure they all work but this is how I do it.
The stars are light years away and I find it really hard to zoom in on one and get it sharp. Instead of doing that I simplify things.
After studying hyperfocal distance charts I discovered the with a wide-angle lens, set to the widest aperture, infinity is reached at a very short distance – something like 5 meters.
What this means is that if I focus on something 5 meters away then everything behind that will be in focus too – all the way to infinity.
To be safe I use roughly 50 meters to focus to infinity with my 10-20mm wide angle.
This is where your buddy and your torch come in handy. Get him or her to shine the torch on something about 50 meters away and using your LCD screen, manual mode and manual focusing, focus on the lit up subject.
Your lens will now be focused at infinity and anything behind that distance will be in sharp focus, including those stars that are light-years away.
Understanding hyperfocal distance is a bit confusing and we don’t really need to know much about it but if you are interested look it up or go to DOF Master to learn more.
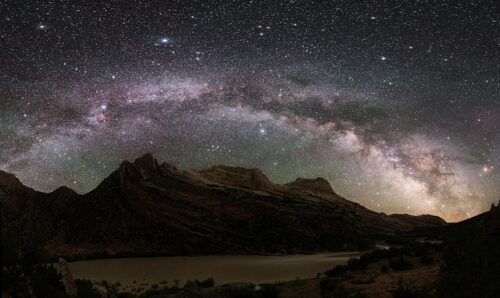
Camera Settings for Milky Way Photography
The Milky Way is one of the most popular star photography subjects.
Setting up for it is pretty easy.
Before you even start attach your remote control, engage the “mirror-up” option and “manual” mode.
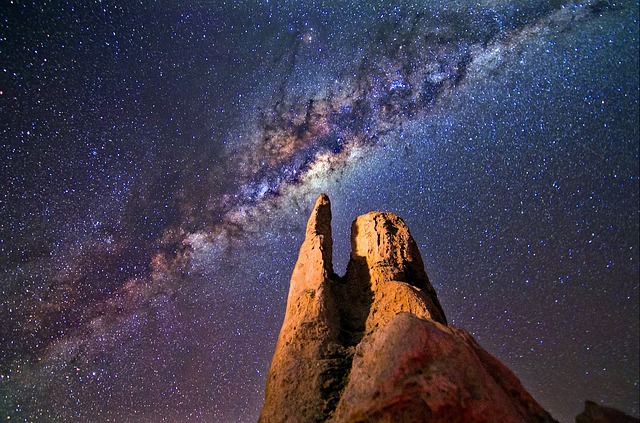
The most important thing is to compose your image first. I always try to get some foreground interest – this can be a tree, rock or the horizon. Whatever it is you want to give a feeling of the vastness of the galaxy. A foreground point of interest does this perfectly.
Once you have composed your image:
- Secure your camera to the tripod.
- Remove the strap. The strap can cause the camera to shake if there is wind or (even worse) get caught on something of yours as you walk past and cause the whole lot to fall over. I keep my strap on until I have secured the camera onto the tripod and then I remove it with the quick release clip. One of the reasons I like the BosSTRAP is that it is secured via the side lug, and not the tripod mount, making this a safe and easy way to avoid damage.
- Set your camera on manual mode and focus it as described earlier using the widest aperture available.
- Be careful not to change the focus once you have it fixed. If its a really dark night I sometimes tape my lens so the focus won’t move.
- Set ISO to 2500 (this will be your starting point and may well go up from here).
- Select the widest aperture your lens will allow – f2.8 is perfect.
- Set mode to “manual” priority.
- You can use auto white balance (I do) or select a range between 2800K – 4000K. Take a test shot and adjust as required.
- For your first test shot select 20 seconds. Over 25 seconds exposure will result in out of focus stars as they will move.
- Consult your histogram to get a true reading of your test shot. You will probably need to adjust the ISO to a higher value.
- Take another test shot, adjust accordingly until you are satisfied with the results.
Once you have everything to your satisfaction you can now start playing with light painting (a whole different subject) by briskly shining the torch on rocks or trees on the foreground. You’ll soon get a feeling for it and what you like.
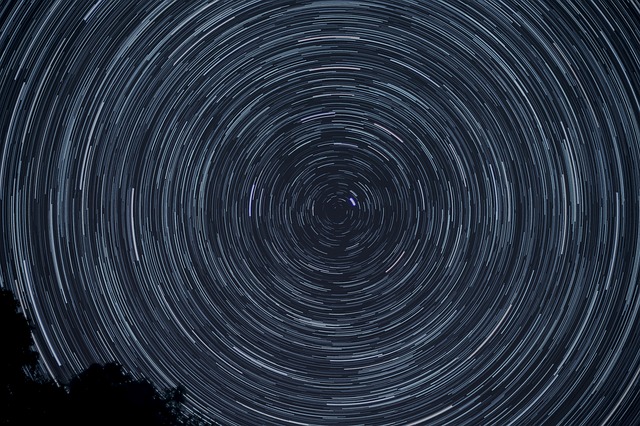
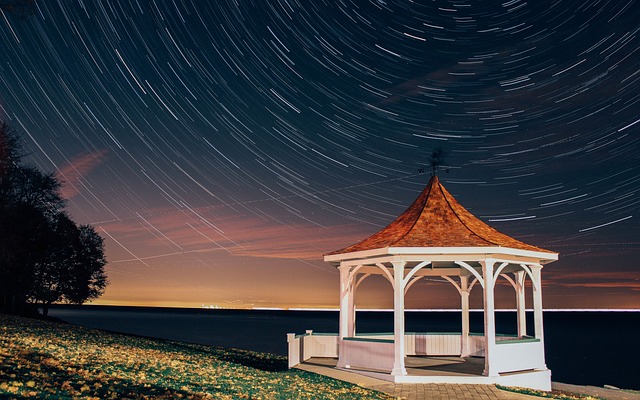
Taking Photographs of Star Trails
Star trail photography is an exciting form of star photography that requires a similar yet different technique.
You still require a tripod, clear, crisp skies, no light pollution, a remote control (but one with a difference (see intervalometer below), a buddy and a torch.
A wide angle lens or a telephoto lens can be used for star trails.
With Star Trails you need a couple of extra goodies.
- 3 to 5 fully charged spare batteries – or better still a battery grip with a fully charged battery.
- An intervalometer – some top end cameras have them as a built-in feature but you can buy external ones for around $20.00 – $50.00
- Lots of time and patience. You’ll be taking hundreds of photos of 2 minutes duration with probably an equal time between photos to allow the camera to buffer and transfer the photos to the card. You’ll likely be out there the whole night.
You want to capture the movement of the stars by using a much slower (longer) shutter speed. Compensate for these much longer shutter speeds that allow a lot of light in by using a smaller aperture of around f5.6 – f8 and much lower ISO – I would suggest you start in the 200- 640 ISO range and work from there).
Your star trail photography will consist of hundreds and maybe thousands of long exposure shots which you then combine in post processing to make one very interesting photo.
The first thing you need to do is work out how long you want your exposure to be and because it will be much longer than the 30 second Bulb option you need the intervalometer and for the same reason you will need extra batteries.
I would suggest you start with exposures as long as 120 seconds (2 minutes) – take a few test shots until you get the length of streak (star movement) that you want.
Remember to trust your histogram for the correct reading.
If your trail test shot isn’t long enough increase the shutter time but remember to adjust either the ISO or aperture accordingly (I suggest you adjust the aperture in the first instance). I quite like messing around and changing things up – 2 minutes, then 4 minutes, then 1 minute etc. hey you won’t know until you try it.
Take however many test shots you need until you get the required result and then start the real thing with your intervalometer.
Intervalometers are remote control shutter releases that you program to take a photo at pre-determined times with pre-determined shutter speeds.
All you have to do from here is start the intervalometer and it will do the rest for you according to the settings you have programmed in.
How many photos you will need to produce one with a full coverage of the sky will depend on your composition.
For example if you have the sky making up 100% of your image then you will need “X” number of photos for stacking into one afterwards.
However if your composition is half sky and half foreground then you will only need 1/2 times “X” to fill the sky portion with star trails. Therefore the less sky you have and the more foreground the fewer shots you need to take to fill the sky.
There is no fixed answer to this question and the only way to determine how many photos you need can only be obtained by you going out and trying – remember to make notes that you can refer back to later.
The best way to learn fast is to go out with someone more experienced to show you the ropes.
BTW Time Lapse videos are made exactly the same way but instead of stacking the photos to create one image they are individually processed and stitched together as a video to show the movement of the stars.
One Last Tip ...
Please don’t be like me …
When I did my first Milky Way shoot with a very experienced friend I thought it would be a simple exercise.
Well it is but I should have taken a note book along to jot down the basics that she tole me – such as start at ISO 2500 and a shutter speed no longer than 25 seconds.
If you are not fortunate enough to be able to go out with someone more experienced jot down what I have written here and take it along with you. Add to your notes based on your experience and remember I’ll never know if you discard my advice and will therefore not have any bad feelings. 🙂
But I would like to hear what you found works better in the comments below – we are here after all to share our knowledge and grow together.