Using neutral density filters can change ordinary landscapes into masterpieces and knowing when to use neutral density filters is equally as important as knowing how to use them.
I mention landscapes simply because that is what ND filters are mainly used for but they can be used for all genres of photography when the situation suits.
Once you master using ND filters your friends and peers will wonder what amazing photography or post processing course you have been on.
Let’s get started …
Contents
So When and Why Would You Use a Neutral Density Filter
Photography is all about light – neutral density filters help us when lighting conditions are too bright (intense) for the image we are trying to create. They do this by blocking the amount of light entering the lens. The amount of light blocked will depend on the ND value, measured in stops, of the filter. See the chat at the bottom for the different range of ND stops available.
You can reduce the amount of light entering the lens by using the slowest ISO setting and the smallest aperture but even this is sometimes not enough – this is where Neutral Density filters come in to their own.
There is another reason why you would use an ND filter and that is to create a certain effect or mood.
For example you may want to create a dreamy seascape where the raging waters are reduced to a smooth surface or where you want to capture moving clouds to look like candy floss. In both these examples the moving subjects create a mood of peace and tranquility while the detail in any static objects is great emphasised.
How To Use Neutral Density Filters
In a previous post I wrote about the best neutral density filters and suggested that the best system was the filter holder system.
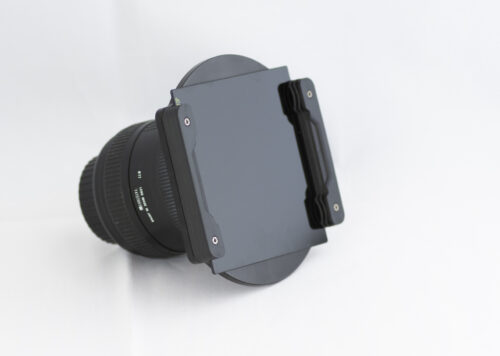
The following is based on the filter holder system but also applies equally to circular ND filters. If using the latter system miss steps 2 and 3 below under “Setting up” and attach the filter as per point number 17.
There are a few essential steps required to using filters.
These steps are based on using a 10 stop ND filter which will mean you cannot see your image through the viewfinder at all
What you will need.
- A tripod – this is absolutely essential. Long shutter speeds cannot be hand-held
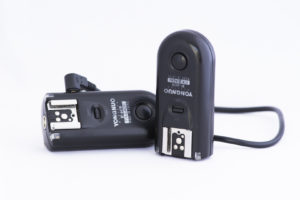
- A remote control shutter release in tandem with the mirror-up function eliminates camera shake and mirror slap. If you have a mirrorless you are still best served with a remote control shutter to eliminate any camera shake.
- A timer if you will be doing exposures in excess of 30 seconds. Most modern digital cameras have a maximum built in shutter speed of 30 seconds – beyond this we need to find a way to keep the shutter open in Bulb mode. I don’t have a fancy timer and instead use a clothes peg to hold the shutter release open on my remote.
Setting up.
- Decide on what lens you will be using and select your composition carefully.
Once everything is set-up you don’t want to be thinking the composition sucks and have to move and start all over again. Take a few photos and see if the composition looks right to you. - Screw your filter holder’s adaptor ring onto your filter holder.
- Now screw the assembled unit on to your lens without the filter glass in place.
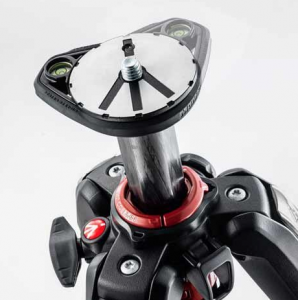
- Set your tripod up – ensure that it is firmly balanced and rock steady! Take into consideration the wind and the ground surface (beaches shift with water so embed the tripod in the sand). Use sandbags or extra weight to add stability if necessary.
- Very Important Step! Work out your plan.
For example if you are taking a long exposure of water and want the water to have that lovely soft ethereal look you need to know how long the shutter must be open to achieve this result. It could be 15 seconds, 2 minutes or 5 seconds – your call.
This plan needs to take into account what ND filters you have and the number of stops each has.
I have three ND filters with varying densities giving me a number of options with various combinations.
My favourite though is my Lee Big Stop (10 stops).
Decide how much of the subject you want to have in focus – this will determine your aperture. - Set your camera mode to “aperture priority” and your ISO to the lowest your camera can go – probably 100 (50 if you have a high-end model).
Set your white balance to auto or your preferred choice. I use auto because I can adjust in post processing. - Secure your camera on to the tripod. Remove the strap from the camera or secure it so it doesn’t blow around in the wind and cause the camera to shake.
- Recompose.
- Attach your remote shutter-release and set your camera to “mirror-up.
- For lenses that have it turn VR (vibration control for Nikon) IS (image stabiliser for Canon) to the OFF position. Vibration control is counter productive when using a tripod.
- Use auto-focus to focus and check your exposure. You may have to adjust the exposure to allow for high contrast lighting or adding a second gradient filter to further reduce the light for bright areas such as the sky.
Get your exposure to where you want it by changing your shutter speed only. This shutter speed will be your starting point.
How many stops is it away from your desired shutter speed?
For example if your shutter speed is 1/125th second at the selected (lowest) ISO and you ultimately want a 20 second exposure you need to stop down 11.5 stops. Could be tricky if you don’t have the correct ND filter. You may have to compromise by adjusting your ISO (my first recommendation) or your aperture. - Change from Aperture priority to manual. Set your ISO to the lowest available (or the ISO you need to compensate as in the step above) then use that ISO.
Check your aperture is the same as it was in step 9 above and set your shutter speed to the one you planned on or worked out.
Your exposure will be way over exposed at this stage but that will correct once you attach the correct ND filter. - Once you have your ISO, shutter speed and aperture dialled in, focus your camera once again using auto focus.
- Another VERY important step. Cover your viewfinder by removing the eye cup and attaching the eye-piece cap that came with your camera. This is essential with long exposure photos to avoid light leaks through the viewfinder. I take an extra precaution by placing a dark lens cloth over the eye-piece when taking the photo.
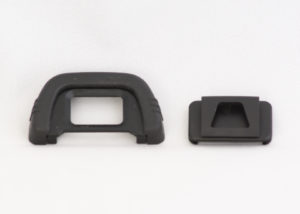
- Change focus mode to “manual” and switch to “Live View” on the back screen. Zoom right in to your focal point and manually focus for maximum sharpness.
- Very carefully insert your filter in the holder making sure that the filter is inserted the correct way* – there is a little quick release lug on the side of the holder to make this a very simple step. Be careful not to adjust the focus (remember it is on manual focus).
* Some filters – like the Lee range have felt cloth around the edges of one side. This felt side should face towards the camera and is there to prevent any light leaks.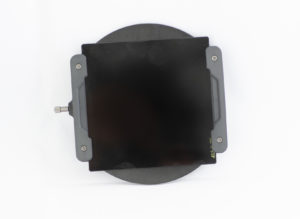
- If using a circular filter very carefully screw it on to your lens making sure not to adjust the focus.
- At this point your screen should be dark (totally black if using a high numbered ND filter such as the Lee Big Stopper).
Check your aperture is correct and that your ISO and your shutter speed are what you want them to be.
If you have worked it all out correctly the exposure indicator in live view will now show as correctly exposed.
If not adjust accordingly – it may mean starting over. - Once done you’re ready to go!
- Press your remote control shutter once to lift the mirror. Wait a few seconds and press it again to expose the sensor.
- Enjoy the process while the camera does the work and then take a look at your beautiful photograph and celebrate!
That may seem like an awful lot of steps but they don’t really take that long and the more you use your ND filters the more automated your work flow will be.
It is all well worth it and exactly how the pros take those beautiful landscape photos with soft cotton clouds and dreamy water.
By shooting in RAW an incredible amount of colour resolution and variance can be brought out and highlighted in post processing.
The expense and effort that goes into using ND filters is well worth it.
The Neutral Density Numbering System
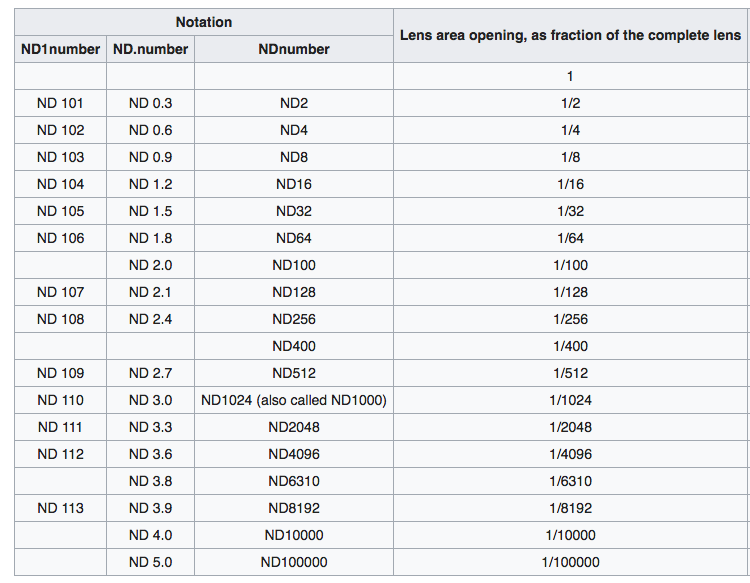
The ND Filter numbering system is one of the most complicated and confusing in photography and rather than try to explain it all I thought it best to give you a table with the numbers and what they all mean..
The following table is a shortened version of what I extracted from wikepedia.org.
Even this chart is confusing but all you need to know is that different numbers mean the same thing.
For example a filter labeled ND 101 is the same as those labeled ND 0.3 and ND2
Get Started Using Neutral Density Filters
When I first got interested in taking long exposure photos I thought I needed to buy a full set of about 10 filters to cover the entire range. This is definitely not necessary and probably not needed as you can adjust the length of time you need with any stopper with the camera settings.
Thanks to advice from a fellow photographer I ended buying a Lee Big Stopper (10 stops) and today it is still my favourite ND filter.
My widest lens diameter is 77mm and that was my starting point. From that I determined that a 100mm filter holder would cover my needs and I purchased the NiSi system together with a 100mm square Lee Big Stopper.
You can read my recommendations and get more information by referring to my post on best neutral density filters.
As always please feel free to leave your comments below – I enjoy hearing from my readers.
