
The best Neutral density filters for photography are ND filters that are easy to use and produce true images time after time, with 100% colour rendition, no loss of quality and zero vignetting.
I don’t profess to know the ins-and-outs of every brand but I do know a bit about ND filters from my own photography experience and from over two years of selling photographic equipment in a brick and mortar store.
Based on that I thought it would be helpful to many to shed some light on using neutral density filters in photography – most commonly used in landscape photography.
Before deciding on which brand you want to use it is prudent to decide what system would suit you best.
Let’s get started …
Contents
Top Brand Names in The ND Filter Industry
In no particular order.
Top Rated Square/Rectangular ND Filter Brands:
- Progrey
- Lee
- NiSi
- Breakthrough
- Formatt-Hitec Firecrest
Top Rated Circular ND Filter brands:
- Breakthrough
- Marumi
- Hoya ProND
- B+W
- Formatt-Hitec Firecrest
Before deciding on what brands to use it may be an idea to find out which system would best suit you.
I have found that I much prefer the square/rectangular system with the filter holder bracket attachment and will explain why.
Neutral Density Filter Systems
Neutral Density (ND) filters come in two shapes – round and rectangular, and a variety of sizes.
Round ND Filters screw directly on to the end of the lens.
Rectangular ND Filters slide into a filter holder that connects to the lens via an adaptor ring.
There are advantages and disadvantages to both systems and the following table best summarises these.

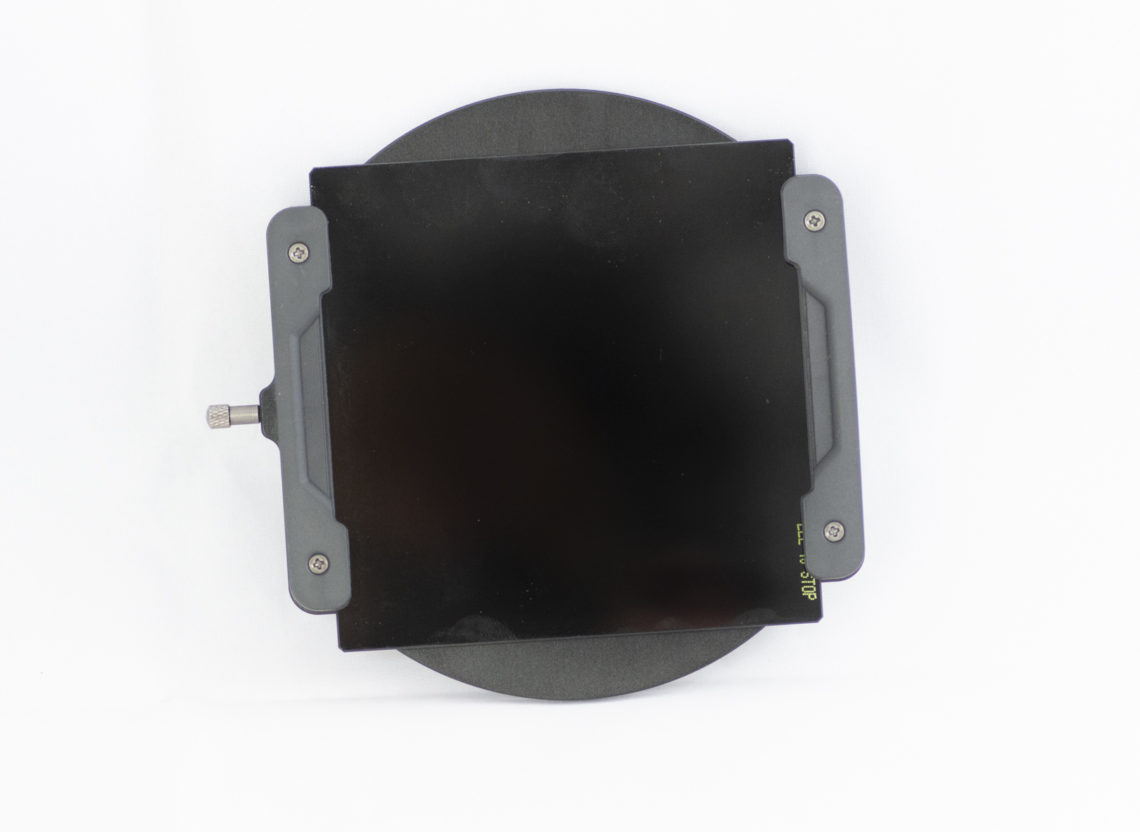
Rectangular Filter Holder System
Circular Screw-On ND Filters.
Sizes and Stop Range
The most common size is 100mm square as this covers most photographers needs. Smaller holders are available but finding filters to fit is difficult and bigger holders are also available – for use mainly with very large lenses – which i don’t have.
I went with the more common 100mm square format as this gives me more options to add to my collection of filters as and when I need to.
Stop Range: 1-16 and some go even higher. When first starting out it is hard to decide what to buy. My first ND filter was the Lee Big Stop with 10 stops and it has been a real work horse.
I have since invested in a 3 stop and a 1 stop. They’re both useful and can be combined with each other and the 10 stop. There’s the versatility of the holder system for you.
Plus of course you can buy the filters individually as and when you can afford them.
See the paragraph further down of the very confusing ND filter numbering system.
Each lens size needs it’s own ND filter – the size is the same as the lens cover and can be found printed on the lens itself. I don’t know about you but I really couldn’t be bothered with having 4 filters for four different lens sizes when one would fit all of them!
OK so that’s not totally true because with adapter rings (called step-up rings) you can use a larger filter on a smaller diameter lens. One of the reasons I was never very food at mechanics is that I am not good with fidgety things! So screwing an adapter ring (or two) into my lens to accomodate a larger ND filter just seems like too much hassle to me. I was out once with a friend who was using this system and he was taking forever to set-up because he kept dropping the adapter ring! He would have to place his filter somewhere safe while he grovelled around finding the adapter ring, clean the dust off and then try again. Twice it happened. No thanks not for me.
Stop Range: 1 – 16 and some brands go even higher. You can also combine two or more filters together but you run the risk of creating a set-up that looks like a tube on the end of your lens! The result is loss of image quality and of course vignetting and a whole lot of unnecessary work in post processing to correct it.
See paragraph below for an explanation of the very confusing ND filter numbering system.
Versatility
- Each filter holder comes with adaptor rings to fit the lens. One adaptor ring per lens size not one filter per lens size. One side of the adaptor ring screws into the lens and the other side is for screwing the filter holder on.
- The holder itself can hold between 1 and 5 filters allowing you the ability to add a number of filters for different lighting conditions – without having to screw more stuff on. The filters simply slide into the bracket holder in slots for this purpose. Its really quick and easy.
- I was once trying to photograph a seascape that had a very bright sky and a pretty average lit foreground. One filter was not enough to do the job properly and I did not have a gradient ND. MY solution was to slot my 10 stop into the first groove and my 3 stop into the 2nd but only push it down so that it was only affecting the sky. So the sky had 13 stops and the sea had 10 – worked perfectly.
The same thing can be done with gradient ND filters but I don’t own one yet. It’s next on my GAS list.
- Not very versatile at all with each lens size requiring its own filter.
- The larger size filters are very expensive and a decent set of filters will set you back a small fortune.
- The other really big negative with the circular models is the inability to block out a portion of the sky as you can with the filter holder system. Sure you can compromise or make a DIY gadget that is time consuming, looks cumbersome and is very much hit and miss or you can correct the exposure in post processing and risk noise. I think it is far easier to do all this with the filter holder system
Cost Effective?
- One filter holder for all your filters.
- Each filter can be used on any number of lenses. The filter fits into the holder which in turn screws on to the lens. In other words you can use the same filter on any lens you own, hire or borrow regardless of its diameter.
- You can add to your collection of filters as and when required and as and when affordable. I have now managed to get my family to buy me filters for Christmas. Its how I got my second and third filters.
- With a universal system you can use different filter brands. My 10 Stop filter is a Big Stopper from Lee while my 3 and 1 stop filters are NiSi – they work seamlessly together.
- Each lens size requires its own filter. For example the filter you use on a 56mm diameter lens cannot be used on a 77mm diameter lens. A 77mm filter can be used on a 56mm lens but only if you have step-up rings to fit and they are clumsy things (or at least to me they are).
- Buying a different filter for each lens size adds up to a lot of dollars very quickly – trust me. I worked in a shop for 2 years and one guy kept coming in to buy different filters for his different lenses. One day he was chalking up a bill of nearly $500.00 when I suggested he guys a filter system and all his lenses would be accommodated for. He wouldn’t go for it because in his own words “I’ve spent so much already what will I do with the filters I’ve got?”
“Sell them” I said but he thought he wouldn’t get his money back. The boss was pleased with my near $500.00 sale! - The larger size filters are extremely expensive.
Ease of Use
This title made me smile because my first attempt at using a frame system must have looked very comical to an outsider as I bumbled about. I had gear in bags, tins, pouches pockets etc. and must have looked like I had lost all my marbles!
There I was with my NiSi system trying to figure out which adaptor I needed for my 77mm wide-angle lens, how to fit it on to the camera, how to fit the filter on to the frame etc.
I’m still smiling at the thought.
But yes the initial use can be comical and you may wonder what you have done but it is actually very simple if you use a bit of common sense.
And I would never have tried the photo at the top of this page ifI wasn’t using a holder system – the wind was pumping so hard that it would have been almost impossible to get a circular filter set-up but having the holder I could attach everything before leaving the protection of my car. It was then an easy matter of simply sliding my Big Lee filter in to the holder with the camera on the tripod.
See the “Using Your Filters” paragraph below for the steps to follow.
Very easy to use but you do need to be careful not to change the focus when you attach the filter.
Usage gets a lot more difficult once you start adding second or third filter and if you need step-up rings. The bad language I’ve heard from people dropping filters and step-up rings while trying to set-up would make a very comical video.
See the “Using Your Filters” paragraph below for the steps to follow.
Pros
- For me the big plus is that one system fits all.
This means you carry less gear and ultimately spend less. - Focusing between shots is a simple matter.
- The adaptor ring and holder does not need to be removed to change composition.
- There is no vignetting with a filter holder system.
- Additional filters (including variable ND filters can) be used by stacking up to *3 filters at a time. * 3 Is the number that my NiSi system holds – other systems may hold more or less.
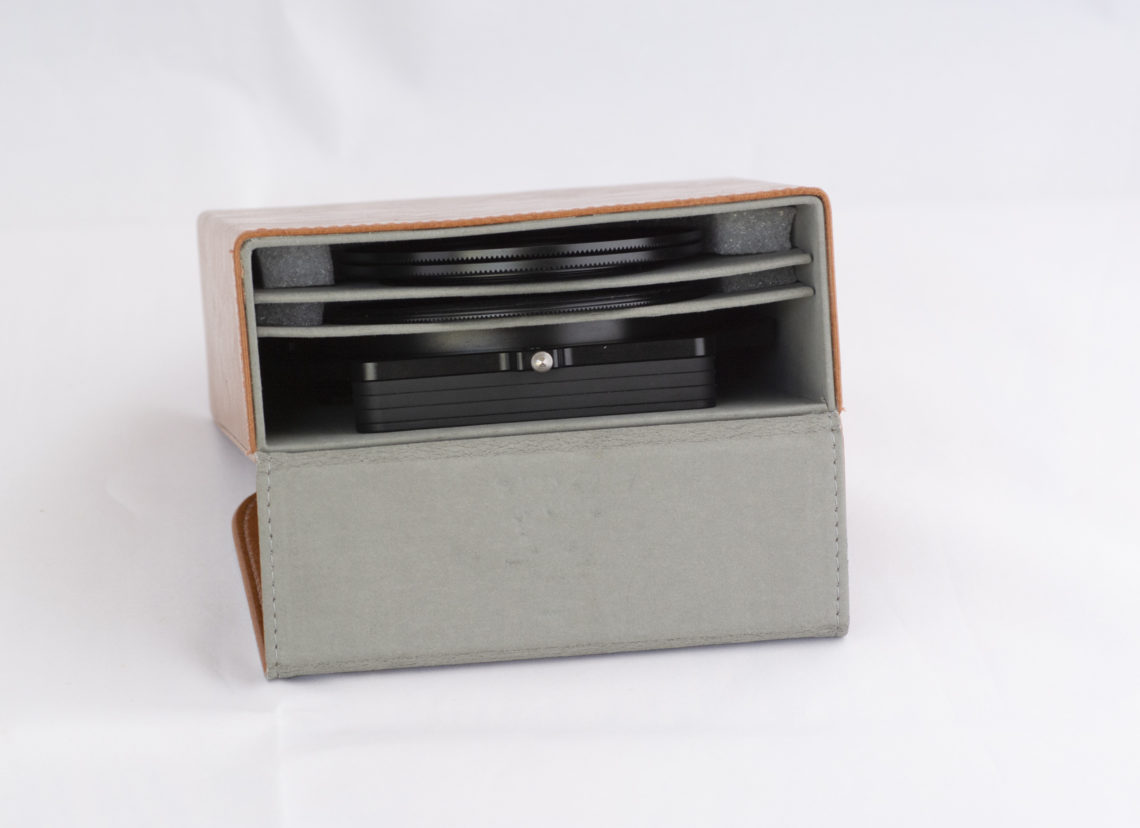
- My NiSi system came in a really nice box set making it easy to keep everything in one place.
- Very easy to use simply screw on and you’re good to go. You do need to be careful not to adjust the focus when attaching the filter.
- Focusing between shots requires the entire filter to be removed and runs the risk of accidentally adjusting focus when being put back on.
- To recompose you need to remove the filter and start again.
- Cannot use variable ND filters – although I have seen kitchen hacks on YouTube which apparently work but look cumbersome.
- The cost of individual filters for each lens size soon adds up making this a potentially expensive way of doing things.
Cons
A bit more involved in the set-up but after that it is easy.
Can work out to be an expensive way of doing things.
Best For
All photography where and in particular landscape and long exposure photography.
Everyday photography including landscape and long exposure photography.
Which Filter System Wins?
Based on the above it is pretty obvious that the square (or rectangular) filter holder system is far more economical and versatile.
Having decided that the holder system is the best and most cost-effective option let’s now look at the quality of the filters from these top brands.
There are a coupled of things I took into consideration in my evaluation which I will touch on here.
You either do or do not do a lot of post processing.
If you do then you want to spend as little time as possible correcting any filter issues.
If you don’t then you want the filter to be true to life.
So what do we look at when deciding on the best brand to buy?
An ND filter is an extra layer of glass that is placed in front of your lens and whenever we do this we have the potential for:
- Colour neutral issues whereby the filter creates a colour cast which needs to be corrected in post processing.
- Loss of image quality in terms of sharpness.
- Vignetting around the edges.
- Incorrect exposure due to inaccurate density. In other words is a 10 stop actually 10 stops or is it more or less than the manufacturer claims?
In long exposure photos such as those taken during sunrise and sunset you do not get a second chance with the rapid changing light. 5 Minutes of ideal light may be all you have.
Brand
Colour Neutral
Vignetting
Sharpness
Density
Overall Score
Progrey
Slightly warm
9.5/10
Minimal
9.75/10
No noticeable degradation
10/10
Slightly lighter than claimed – 9.5/10
9.7/10
NiSi
Slightly warm
9.5/10
Slight
9/10
No noticeable degradation
10/10
Only just slightly darker than claimed, barely noticeable – 9.5/10
9.5/10
Breakthrough
Slightly warm
9.5/10
Slight
9.25/10
No noticeable degradation
10/10
Slightly darker than claimed – 9.6/10
9.6/10
Lee
Noticeably cool
9/10
Quite strong
9/10
No noticeable degradation
10/10
Very slightly darker than claimed – 9.8/10
9.4/10
As can be seen there isn’t much difference between the top brands and for all intents and purposes any of them will do a great job.
In all cases the differences are marginal and, other than the Lee filters, very few adjustments will be required in post processing.
Should You Buy Expensive Filters
The answer to this question is a resounding “Yes!”
The leading brand names are expensive because they use high quality scratch proof glass that is anti-reflective, distributes light evenly and has no loss of colour rendition.
The cheaper brands and plastic options do not do distribute light evenly, cause refraction and loss of colour.
Cheap plastic ND filters are not worth the money and scratch very easily. On a recent outing to capture some waterfalls with ND filter a friend of mine tagged along, very excited to try out his new filter set. All was going along fine until his filter got a fine layer of water spray onto it. Instead of using a lens cloth to wipe it off he used his soft shirt sleeve and that was enough to scratch the filter. Of course the scratches showed up in every photo he took after that and it took him hours in post processing to try to eliminate them.
My Neutral Density Filter System Combination
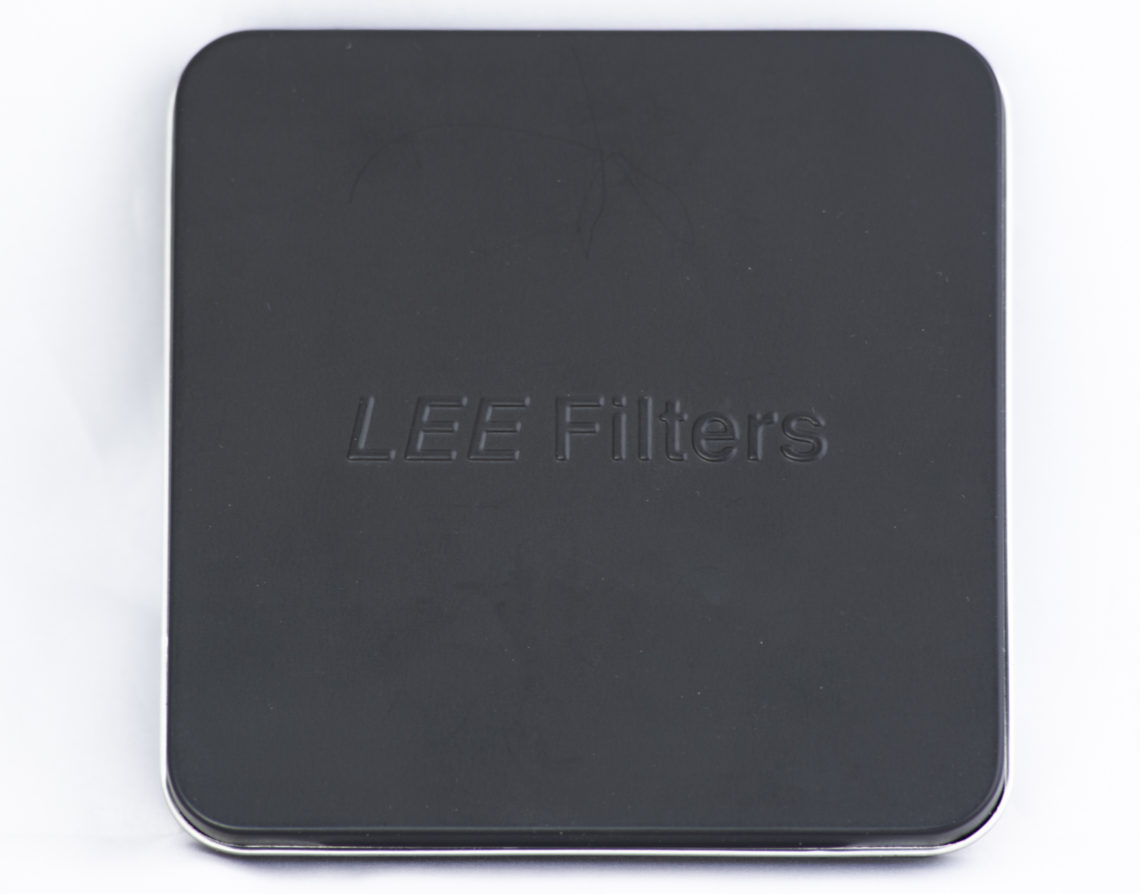
After doing extensive research I landed up using the NiSi filter holder with Lee ND filters.
My choice was determined by both reputation and build quality at the time (some 4 years ago).
I chose the NiSi filter holder bracket over the other brands for the outstanding build quality and the Lee filters based on their solid reputation.
I have had no reason to regret my decision but if I was to buy new filters today I would favour the NiSi range.
One of the reasons I originally purchased the NiSi system was its universal appeal making it possible for me to select other brands should the need ever arise.
Other Types of ND Filters
Graduated Neutral Density (GND) Filters.
Mostly used in landscape photography GND filters are filters that change from very light on one side (often no density at all) to dark on the other. This change can be gradual or a very distinct line for different situations.
Gradual variance are used where there is a broken horizon, such as that found between mountains and sky, while the distinct lines are used where the difference is a virtual straight line, such as sea and sky.
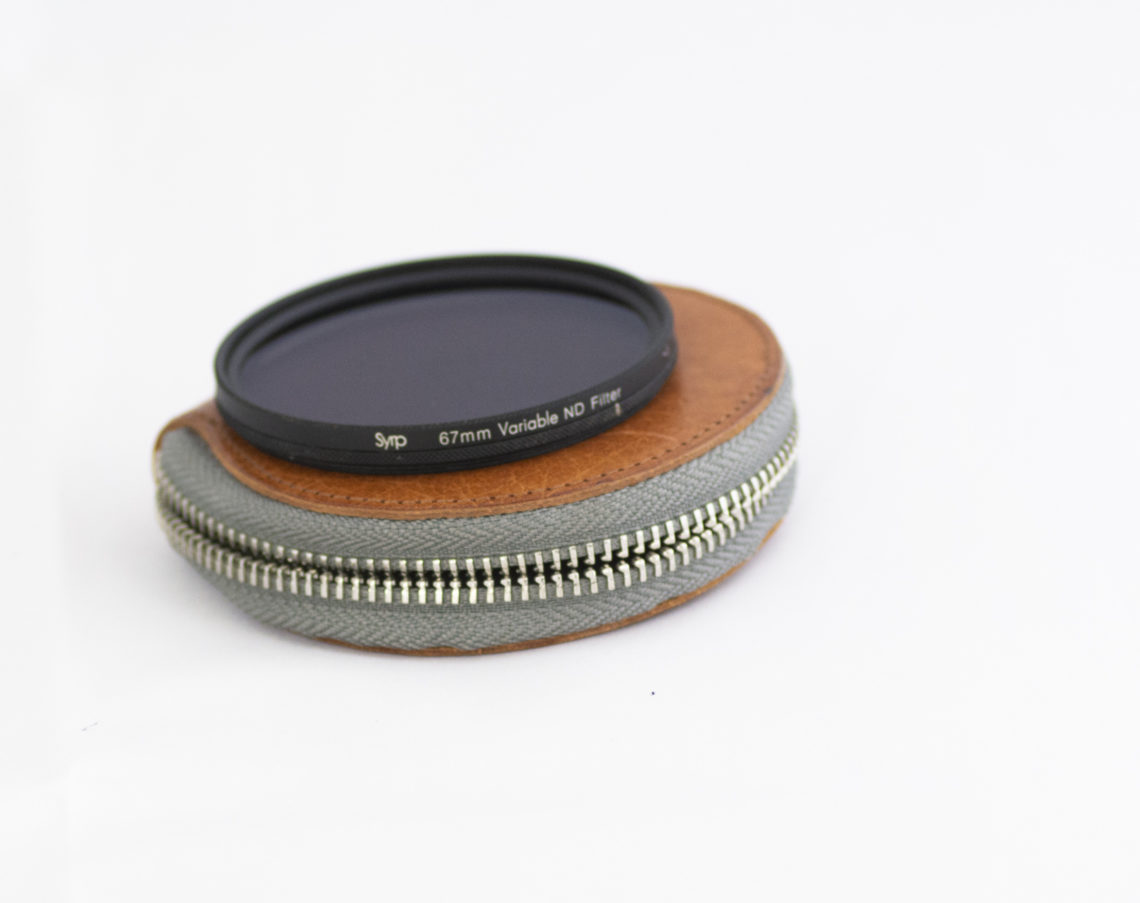
Variable Neutral Density Filters.
Variable Neutral density filters have two pieces of glass. One is fixed and the second one rotates providing different levels of density in one filter.
They are only available in round format.
Made by a couple of companies I found the Syrp series to be excellent. Syrp come with three step-up rings, are beautifully presented and a leather pouch to store the filter in.
Centre Weighted Neutral Density (CND) Filters.
The least known and used. CND filters are designed with extreme wide-angle lenses in mind. With a more densely darkened centre the concept is designed to more evenly distribute the light over the entire frame with the ultra wide lens.
Polarising Filter
A polarising filter is in effect a lightly coated variable density filter equal to about 2 stops of light.
Polarising filters are able to cut down glare, darken blue skies, and see clearer into water – all effects that cannot be produced in post processing.
Great post about ND filters for high-end cameras. I’m not a photography lover but my cousin is and he loves having different lens and filters depending on the situation. I never got involved or I never asked about his filters but now I know what they can deliver thanks to your very accurate well detailed post.
Being able to get a wider aperture is something that a lot or person wants when doing panoramic pictures and using these filters will help them on the long run. I appreciated your info. Thank you. Al
Hey Al
Thanks for your comments.
I smiled a little smile – filters do not help with apertures, that particular function or option is one that is unique to the lens. See my post on apertures for more detailed information on how it al works.
Filters control the light – a bit light a shade cloth or net curtains.
Your cuzzie and I might make a photographer of you yet.
Have a great day my friend
Lawrence
Today’s mobile phones have built-in filters that allow anyone to correct pictures into something amazing but nothing can match the original filters like this GND filters of high-end real cameras.
I have bought several phones for the purpose of using them in photo blogging but they seem like lacking in functionality compared to real cameras. They seem to be gimmicks (limited at that) designed for faux arty photos. They just don’t quite look right and have all been a bit of a disappointment if I have to be honest.
Getting serious with my photo blogging, I’m planning to buy a DSLR camera and use filters, where necessary to enhance my photos.
What Camera would you recommend for photo blogging for a newbie?
I’m glad I cam across your website.
Hey Gomer
Thanks for popping in and leaving a comment and a question.
Most photographers hate those filters they have on phones and we particularly hate the Instagram filters when used by others on photos we have produced. It’s a considered a big NO NO to alter an original photo without the photographer’s consent. Imagine buying a painting and changing it!
That aside I have to admit that from a convenience point of view phone cameras are hard to beat.
Click and post and you’re done! Nothing could be easier.
But then therein lies the lack of fun too – I guess it all depends on priorities.
Hard to advise on the best camera for you without knowing:
1. your budget and
2. how much time you want to devote to photography.
That being said though I highly recommend a Nikon D3400 or even the more recent upgrade of Nikon D3500.
Take a read of this post: The Best Camera for a Beginner Photographer
And be sure to look at the Nikon D3500 as well – I have yet to do a full review on that one but I imagine it is better – should be if it an upgrade.
Hope that helps and once again thanks for stopping by.
Have a great holiday break – and all the best for 2020
Lawrence