No photography gear is complete without a decent photography lighting kit.
Owning a lighting kit and learning how to make the most of it takes anyone’s photography to the next level (or two).
Understanding and being able to manipulate light to create the image you want/envisage is the key to taking your skills to the next level.
But with so many options available what lighting best suits your needs?
Photography is all about lighting …
“Light makes photography.
Embrace light.
Admire it. Love it.
But above all, know light.Know it for all you are worth, and you will know the key to photography.” ~ George Eastman
That pretty much says it all for me and once you learn to use light your photos will improve dramatically.
Grab a coffee (or a wine if it’s that time of day) and let’s light up your game.
Contents
What Will You Be Photographing (and where)?
Your choice of lighting will depend on what you intend to photograph and where you will be taking the photos.
- Will you be shooting indoors or outdoors?
- Are your subjects moving or static?
- Are your subjects big or small?
- Do you want dramatic or flat lighting?
- Will you have time to set-up lighting or will your photos be taken on the move?
- How many lights do you feel you need?
- What accessories will your lighting set-up require by way of diffusers, stands triggers etc.?
- And finally what is your budget?
Why Buy a Lighting Kit?
In a Phrase – “Value for Money“
You can buy individual lights and accessories as you go along, usually as funds allow, but it is a much more expensive way of accumulating your lighting kit or setting up your studio.
Lighting kits come with most everything you’ll need, all packaged together, in one parcel.
It may seem like a big chunk of change up front but lighting kits are much cheaper than buying the individual components over a period of time.
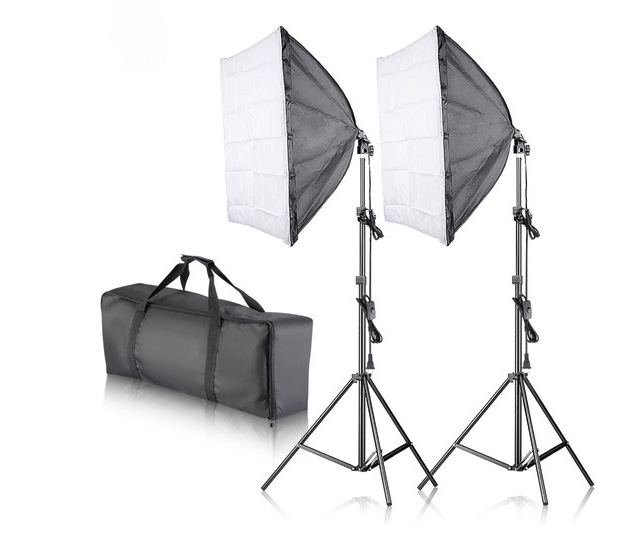
Typically, a lighting kit will come with 2 or 3 lights, a trigger, light stands, an umbrella (or two) and/or a soft box, a couple of backdrops and a backdrop stand and a reflector.
All in one convenient carry case.
That’s a lot of gear in one package and a much cheaper than buying each item individually!
The other great advantage to buying a complete kit is that you can get started straight away.
No waiting – unpack it, set it up and start shooting.
Let’s start with a lighting kit that you can use in a studio or take out into the field.
Lighting Kit For A Studio ... or for out in the field
In deciding exactly what lighting kit will suit your requirements you’ll want to assess your personal situation.
As this section covers lighting for studio and field-work it applies to the more serious and possibly full time photographer, one who possibly has clients.
For the everyday photographer the lighting kit covered in the next section will be more appropriate.
One of the first things you probably need to consider is the area you will be using as your studio and what you will be photographing.
- Is it a dedicated space such as a purpose built room, your garage or a particular room in your house?
- How big is the room and specifically the shooting area?
Maybe you plan on hiring a hall somewhere or you want to shoot on location in people’s homes or offices. If so, the shooting space will vary from session to session.
The size of the room you shoot in plays an important role in your lighting selection because a smaller room will have more light bouncing back off the walls and ceiling than a bigger room.
If walls are coloured anything other than white (or slightly off-white), that colour will create a matching (unwanted) tint in your images.
I have a friend who thought his camera’s White Balance had gone wrong – turns out he had a fairly dark blue wall in his studio which gave off this blue hue.
White, or slightly off-white, walls and ceilings are the best. Be aware that lighter wall and ceiling colours will generate more light (particularly in smaller rooms) due to the bounce factor.
I love a dark grey wall as one of my studio walls – I can use this as a background or to add drama. Black or dark V flats are excellent for this purpose.
Is there any natural (ambient) light that spills into the room from a window or door?
Create different moods and drama by using ambient light within your images. It all depends on what result you are trying to achieve.
For very small studios, or simple portrait photography, a one light set-up may be all you have space for.
One light can produce a great variety of shots simply by changing angles, using reflectors, bouncing off walls and ceilings, moving the light around etc.
Don’t let having only one light put you off.
A one light set-up is quick and easy to set-up for photo sessions away from your home studio.
With a one light set-up there is no need to lug around tons of gear.
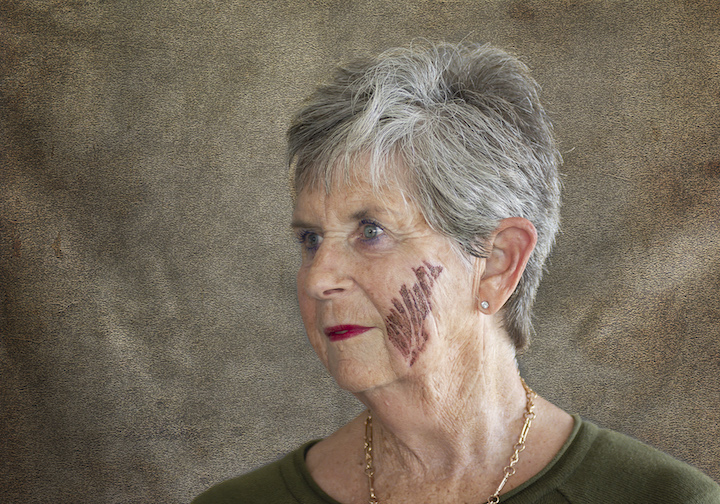
This portrait photo shown on the right was taken using a one light set-up with a towel as a backdrop.
You may not like the photo but it is well lit.
Three Types of Artificial Light Available
There are essentially three artificial light sources used in photography:
1. Flash (speed-lights) – covered in more detail in the “everyday photographer” section which follows, but to add a brief note.
You can control the intensity of your lights by altering the distance between the flash and the subject, adding diffusers (umbrellas and soft boxes), changing the settings (as described in the next section) and bouncing the light off walls, ceilings and reflectors.
This holds true of all artificial lighting.
All speed light has a GN number. GN stands for Guide Number and is an indication of the maximum distance the flash will be effective at in relation to a pre-determined f stop (aperture) and ISO.
Calculating the GN number is a bit of a complicated formula but for ease of explanation the GN numbers allocated to speed lights is based on an ISO of 100 and a fixed distance of 10 feet with the aperture set at f/4. Hence, a speed light with a GN number of 58 is more powerful than one with a GN number of 40.
Warning – some manufacturers (invariably 3rd party manufacturers) are less than honest and use an ISO of 200 in their calculations. This then looks as if the flash is better (stronger) than it actually is.
Make sure you are comparing apples with apples when selecting your speed lights.
2. Strobe Lights (also known as Mono-lights)
Still a flash but much more powerful than your standard speed-light.
The speed-lights I talk about in the next section generally produce somewhere between 60 and 100 kilo watts (KW) of power.
Strobes are much more powerful, usually starting at around 250 KWs and going as high as 1000 – 1200 KWs. The recommended limits for optimum lighting are between 300 and 600 KWs
The quality and consistency of the light produced by strobes is higher than speed-lights.
Recycle times on mono-lights are much quicker than speed-lights.
The biggest advantage of mono-lights over traditional smaller speed-lights is the availability and selection of modifiers that one can use; beauty dishes, octo boxes, larger umbrellas, barn doors, strip lights etc.
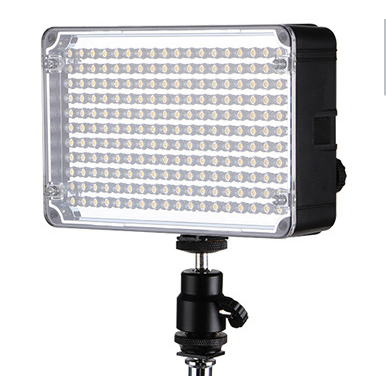
3. Continuous lighting.
These come in the form of Tungsten, LEDs (very nice for video) and Fluorescent – the output is given based on colour temperature scale measured using the Kelvin light scale.
As the lighting is completely independent of the shutter, continuous lighting does not produce a burst of light when the shutter is released.
Continuous lighting is essentially always used off-camera.
They are easier to use than speed-lights or strobes with no need for trial and error type test shots – what you see in front of you is what you will produce with the camera.
In the early days of continuous lighting one of the big disadvantages was the heat the lights generated, often making it uncomfortable for the subjects (particularly babies).
Modern technology and colder light sources has virtually eliminated this problem and lights remain cool even after prolonged use.
The power output of continuous lighting can be adjusted as required on the lights themselves.
Continuous lighting is not as powerful as flash or strobes and your camera settings need to be adjusted accordingly.
The advantages of continuous lighting are many; the big one being that there are fewer adjustments of settings, no lighting test shots required and are easy to use
Continuous lighting is often highly recommended as a very logical solution for the beginner photographer because of their ease of use.
Which Photography Lighting Kit Do I Recommend and Why?
It was a tough call but I eventually decided on a particular strobe lighting kit for use in the studio and in the field.
Are you ready for this?
Be prepared to fall in love and become a Godox fan for life!
I am about to introduce you to a small package that packs a seriously big punch.
They say dynamite comes in small parcels.
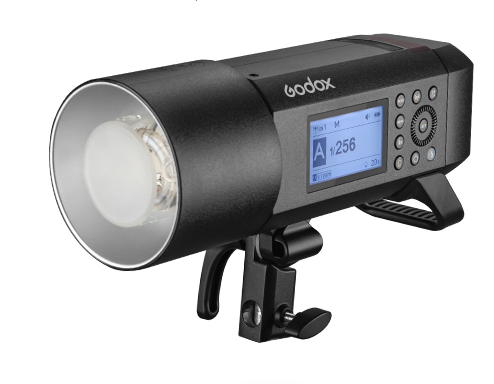
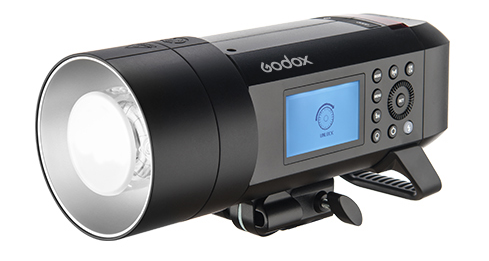
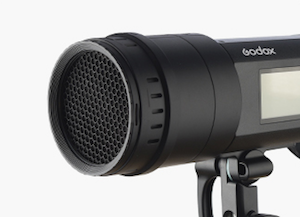
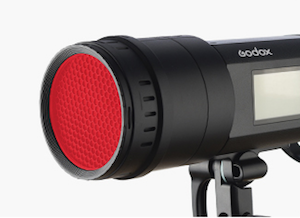
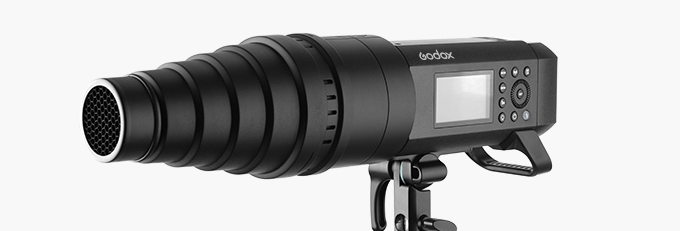
The Godox AD400Pro - the lightweight that packs a BIG punch!
The Godox AD400Pro is truly something else and has everything you’ll need at an incredible good price.
Let’s start with the basics.
Godox Witstro AD400Pro All-in-One Flash
The Price: $649.00 (Amazon)
Guide Number: 72M at ISO100
Power Output: 400Ws with 9 stop range from full power to 1/256 power adjustable in 1/3 increments
Recycling Time: 0.1 to 0.9 seconds (full power)
Wireless Trigger: Built-in 2.4GHz with 100 meter range with 5 controllable groups and 32 channels
Flash Duration: 1/240 to 1/12,820 sec
Sync Speed: Up to 1/8000 sec High Speed Sync (HSS)
Sync Type: Radio, Optical, Button, Cable
Slave Mode: Yes with S1 and S2 Modes
Power Supply: Lithium ion – included in package. AC adapter (sold separately)
Battery Life: 390 flashes at full power
Weight With Battery: 2.1 Kilos (4.6 pounds)
Compatible with: Canon, Nikon, Sony, Fujifilm, Olympus, and Panasonic TTL systems
Accessory Mount: Bowens Type
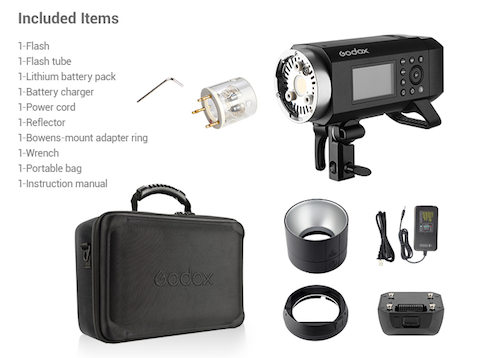
Package Includes:
AD400Pro flash body, flash tube, Lithium battery pack, battery charger, power cord, Bowen reflector, Bowens mount adapter ring, wrench and instruction manua
Who is Godox AD400Pro for?
- The photographer who does both studio and field work and requires lightweight portability coupled with reliability and a long battery life.
- The photographer who is more than an everyday photographer and relies on quality lighting to produce consistently great photos – either for personal satisfaction or for clients.
Pros:
- A very inexpensive light for what you get and great value for money.
- Great build quality – these lights are robust and solid but lightweight. They come in a lightweight but strong case that protects them during transportation.
- No power cords mean you, your assistant and your client won’t be tripping over them. They always seem to get in the way and not having that to worry about is a big plus. This also makes shifting the lights around that much easier.
- Small and compact making it easy for you to take out into the field.
- At 400Ws the AD400Pro provides ample lighting, in even the most trying conditions, with enough power to overpower the sun even on bright days allowing you to control the lighting and create the image you want.
- Fast Cycling between shots – so fast (between 0.1 and 0.9 second) that you are unlikely to even notice a lag time.
- At 1/16th power the unit can shoot 12 frames per second – this is a fantastic feature when you want too record movement in photos. Insert the ballet dancer image if possible (the one on Amazon)
- The stable color temperature mode controls the colour temperature to within 75k and is particularly good for skin tones, indoors and out. This means your photos will produce a consistent color tone throughout a session and save you time by not having to make adjustments while shooting or correct tones/colors in post processing.
- The Bowens accessory mount means you have a wide range of excellent lighting accessories to choose from; snoots, diffusers, soft boxes, beauty dish etc.
- The strong modeling light can be used to lock focus at night and one guy even uses the 30 watt modeling light for video work! I think I will try that.
Cons:
- The one thing that irks me is why they couldn’t include an AC adapter. Really it is such a small thing to include – even if they up the price to cover it.
- It has been said that the 400Ws is lacking in power, especially when compared to the bigger brother AD600, but that’s to be expected isn’t it? I guess the trade off is more power and more weight or less power and lighter.
Overall Impressions of the Godox AD400Pro
This unit pretty much speaks for itself with nothing bad to say about it.
What I haven’t mentioned yet is the AD400Pro’s good looks. It’s a really great looking strobe that will look the part (dare I say sexy?) in any studio or out in the field.
Clients are always impressed or influenced, sometimes sub-consciously, by the look of your equipment. And let’s be honest it feels good to look good. And it gives you confidence knowing your studio looks professional.
The output control options, ranging from full power to 1/256, are fantastic for selecting between a main (key) light and supporting fill light. This range also makes it easy to incorporate ambient lighting into your shots at the intensity you choose.
While having one light is good, adding a second light will give you many more lighting options. You may want to consider getting a second (and possibly third) Godox AD400Pro.
A two light kit costing around $1300.00 should provide you with all the lighting you need.
Add a few accessories by way of stands, soft boxes, reflectors and umbrellas and you have all you will ever need.
A lot of the reviews on Amazon said that purchasing the AD400Pro has resulted in them switching all their gear over to Godox – you can understand why.
Read more customer reviews from Amazon and learn more about the Godox AD400Pro.
If you decide to get one be sure to get out there and take photos and show me the results in the comments section below!
A Lighting Kit - for the everyday photographer...
Now let’s talk about something for the photographer who wants a considerable amount of flexibility and options in the bag or at home – the type of photographer I call an”everyday photographer”.
I’m an everyday photographer – simply because I love going out and doing my own thing and not having to worry too much about clients and this powerful little set-up works beautifully for my needs.
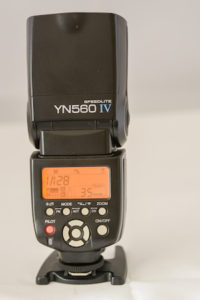
For a number of years now I have been using Yongnuo speed lights and had nothing but incredibly good results with them.
Recommended Photo Lighting Kit for Everyday Use
My everyday lighting kit, which I have no hesitation in recommending, consists of:
2 x Yongnuo YN560IV Speedlights
1 x Yongnuo YN560 -TX Manual Flash Controller
4 x Yongnuo RF – 603N Trigger/wireless shutter release and on and off-camera hot shoes.
With this simple lighting kit I can do everything I need to do – to a very high standard.
The total cost of this lighting kit is $254.97 from Amazon.
Compare this to the popular Nikon 4814 SB-500 AF Speed Light which sells for $246.95 for just the single speed light.
Canon speed-lights are similarly priced to the Nikon, and neither does anything more than the Yongnuo.
The Yongnuo 560IV speed-lights are:
- inexpensive, at less than half the price of the equivalent brand names,
- robust,
- extremely reliable,
- fast recycling and
- very easy to use.
Here is a detailed review of why I rate this system so highly.
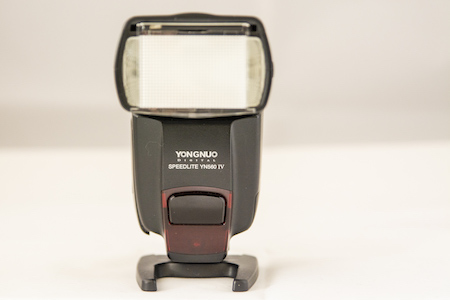
Yongnuo YN-560 IV Flash Speed Light Kit - my personal experience.
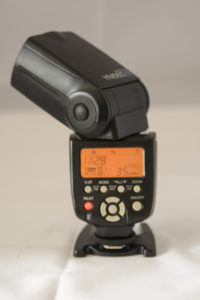
Yongnuo YN-560 IV Speed Light
Price: $76.00 (Amazon)
Guide Number: 58
Connection: Either directly on to camera hot-shoe or as an off-camera unit.
Wireless Trigger: Range up to 100 meters
Multi Functions: Receiver, transmitter and slave
Channels: 16
Groups: 6
Zoom Modes: 24mm, 28mm, 35mm, 50mm, 70mm, 80mm and 105mm.
Recycle Time: < 3 Seconds
Power Settings: 1/1, 1/2, 1/4, 1/18, 1/16, 1/32, 1/64 and 1/128
Tilting Head: 90 Degrees from Horizontal to Vertical
Head Rotation: 360 degrees from front to back
Power Supply: 4 X AA batteries
Compatible with: YN560-TX, YN560 III, RF-603, RF-603 ii, RF-605 and RF-602
For: Canon, Nikon, Sony, Pentax and Olympus cameras (probably works with others too but check first)
Included in Packaging:
Yongnuo 560IV speed-light, Speed-light pouch and threaded foot stand
Who is the Yongnuo 560IV speed light for?
The everyday photographer who is looking for a decent speed-light.
Pros:
- Is solidly built
- Has a fast recycling time
- Is reliable – shot after shot
- Is easy to use
- Can be used as off-camera lighting
- Has a wide range of options and
- Is extremely well priced.
Cons:
- Limited user manual translated from Chinese to English. YouTube has several videos that were a great help.
One light or two?
One light could well be enough for you but if you need extra lighting for whatever reason – and I can think of back-lighting, rim-lighting, side-lighting, overhead-lighting, fill-light etc. – consider getting 2 or more units.
Each speed light can be independently set for power output and zoom, giving you maximum control over your lighting set-up.
View the Yongnuo 560IV lighting kit and learn more about it.
You can fire an off-camera YN560 IV speed light by setting it to slave mode and using your camera’s built-in flash or any other flash attached to your camera’s hot shoe to trigger it.
While this will work perfectly well any adjustments you want to make to the Yongnuo speed-light will need to be done manually; that is, you will have to go to the unit and change the settings.
A controlling transmitter allows you to make these changes from your camera saving you time and giving you more options.
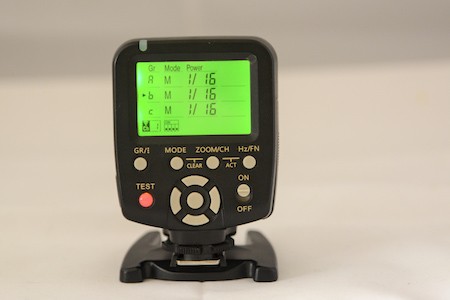
Yongnuo560-TX Transmitter
Yongnuo560-TX Transmitter
The Price: $38.99 (Amazon)
Connects: Directly on to camera’s hot shoe
Transmits: 2.4G Range up to 100 meters
Functions: Adjust all flash functions directly from the transmitter
Controls For: Up to 16 channels in 6 groups (A through F)
Controls: Mode, zoom, power settings, multi-flash frequency and count for each speed light group in use.
Power Supply: 2 X AA batteries
Compatible with: Yongnuo RF-602, RF-603 and RF-603ii,
Supports: Wireless shutter RF-603, RF-603 ii and RF-603 iii
Who is the YN560-TX transmitter for?
- Lazy guys like me who want to control the lighting from where I am rather than go to the speed-light and change it manually.
- Photographers who use the Yongnuo 560IV speed-lights – particularly if you’re using more than one light.
Remote Shutter Release and Wireless Flash Trigger for Your Yongnuo Photo Lighting Kit
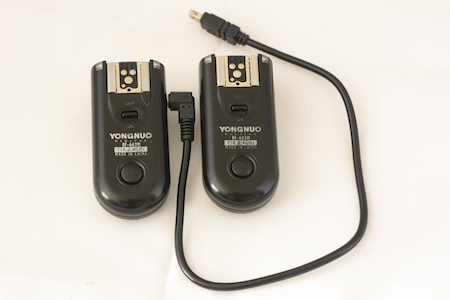
Yongnuo RF-603N (newer version is the RF-603N III) –
NB: The remotes for Nikon Cameras are denoted as 603N while Canon camera remotes are denoted as 603C
The Price: $32.00 (Amazon)
Connects: Directly on to camera’s hot shoe and by N3 (or C3 for Canon) cable to the cameras port (on the Nikon D7100 it is the GPS port)
Transmits: 2.4G Range up to 100 meters
Functions: Wireless shutter release control to trigger the camera. Each unit is both a transmitter and a receiver. *See notes below.
Power Supply: 2 X AAA batteries
Compatible with: Most Nikon and Canon models – be sure to check before buying that you have the correct model for your camera make.
If not Yongnuo will have a different range for you – do a search for one that is compatible with your specific camera.
*Notes on remote Shutter Releases.
There are a number of different shutter release options available and for the most part they all work perfectly.
The RF-603N (or C if you have a Canon) work exceptionally well and have a very long operating range – you can be as far as 100 meters from your camera and will still be able to trigger it.
This is really useful in a number of applications – for example if you want to be in the photo yourself or have your camera set-up some distance away (say near a bird bath) where firing the trigger manually won’t work.
If you have the YN 560IV speed-lights and the YN560-TX transmitter you will have the best of both worlds as you can use them all in conjunction with each other.
Each shutter release (RF-603N) acts as both a transmitter and a receiver.
Attaching one to the camera (via the very short cord) will allow you to trigger the shutter with that trigger.
If you want to trigger it from further away (highly likely) you need two units as follows.
Attach the first to the camera using the cord and seat it in the camera hot shoe. Switch it on. This now becomes your receiver and you can use the 2nd RF-603N from up to 100 meters away to trigger the camera. The 2nd unit becomes the transmitter sending a signal to the one board one to fire the camera.
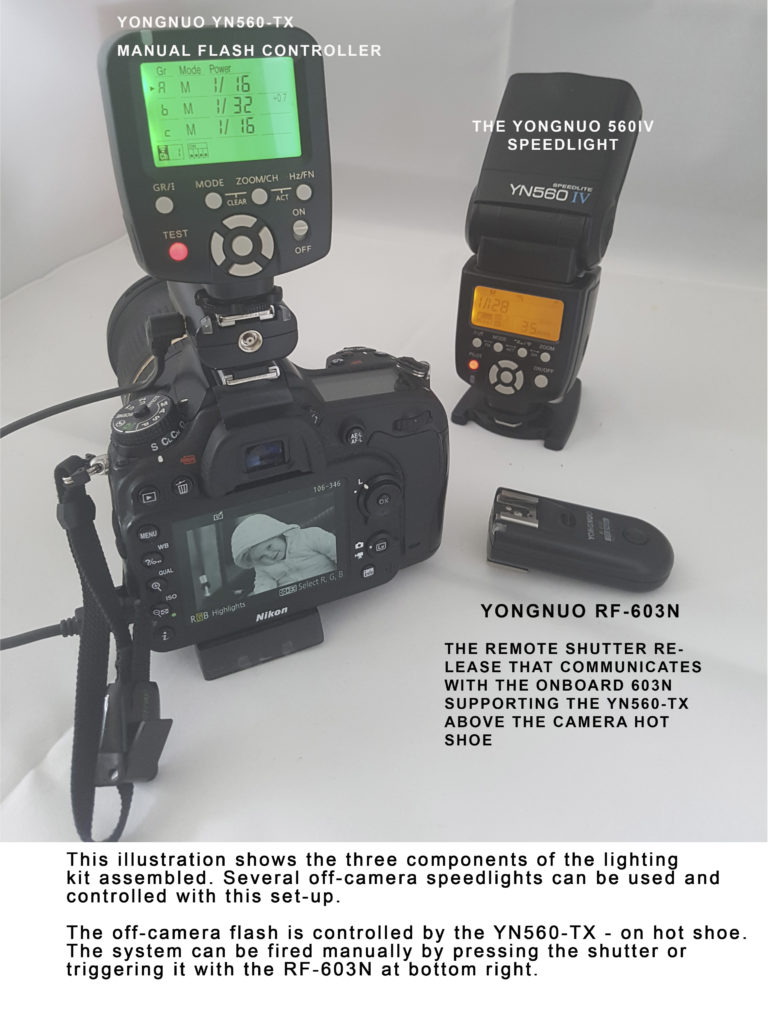
With the remote shutter attached this way you can add the flash controller/transmitter (YN-560TX) to the top of the remote shutter by means of the built-in hots on the shutter release.
See photo right- showing all units connected
All this kit fits very comfortably in my bag and is quick and easy to assemble and use.
With a few additional accessories in the shape of light stands, umbrellas, a soft-box and reflectors this simple set-up serves me well in my current home studio and whenever I am out in the field.
Photography Lighting Kit Summing it Up
Researching a photography lighting kit for myself was very interesting and I came across a wide variety of options for my proposed new studio.
I spoke to a number of lighting experts, visited a few studios, tried out a few lights and generally learned quite a bit.
While looking for studio lights I also researched speed-lights and was not surprised to find that my existing speed-lights are truly one of the best options available and much cheaper than anything I came across.
For the studio lights all I can say is WOW!
There has to be a winner and sadly there are also losers.
Some great kits were left out for one or other reason – maybe I will do a post on the other kits that I really liked.
The biggest thing I noticed was that the low-powered models, while being cheaper, just don’t cut the mustard.
For just a few dollars more you get a heck of a lot more light and functionality.
The Godox AD400Pro strobe lights recommended here are excellent value for money and will give you continual excellent service for a long time to come.
Don’t forget to check out what other people say about my recommendations and keep an eye out for deals on Amazon and elsewhere.
Get more info on the Godox AD400Pro here.
Get more info on the Yongnuo 560IV here.
And then finally – why not tell me your thoughts, the lighting you use and what you have on your bucket list in the comments below
I’d love to hear from you …
Until next time – let’s light up the world and record it for future generations.
Wow! There is a lot more to lighting than I realised! Thank you for sharing all this information, Lawrence.
I am not a photographer but I am an online marketer and need lighting for my YouTube videos. To keep things simple, I shall be shooting the bulk of my videos in my office and home, both have off-white walls and ceilings thankfully! Due to budget constraints, I shall be sticking to the basic tools of a webcam and or mobile phone for now (I know, you’re probably cringing, sorry). But I know where to visit when I have the budget available for the “recording studio” 🙂
Really appreciate the time you have taken to share your knowledge. Thank you very much.
Blessings
Louise
Hi Louise.
Me cringe? I don’t cringe easily. 🙂
It’s ironic you bring up lighting for videos because in my research for photography lighting kits I came across several continuous lighting kits that were specifically geared towards videography. Watch this space as I will revisit those lights and do a review on them.
I also came across a lot of starter photography light kits that had fabulous reviews and were a lot less expensive. I’m going to do some more research into those and see what I can recommend to others on a budget.
All the best with your online business – videos are definitely the way to go.
All the best
Lawrence