Photography metering modes can be a bit confusing to the beginner/newbie. I thought a simple explanation of how they work and differ would benefit my followers.
And of coourse with all the other buttons, settings and menus to contend with are metering modes important enough to concern yourself with them?
Do you ever get frustrated wondering why some of your images come out too dark and others are over-exposed?
You check the exposure meter before taking the photo and it indicates that the exposure is correct yet the image is over or under exposed in certain areas – what’s up with that and how do you overcome it?
This post will help you understand why this happens and how to solve the problem.
The following is a brief and general description of how digital photography metering modes work. For a more detailed and specific explanantion read your cameras manual and practice using the different metering modes.
I’ve included an exercise to try for each of the three main metering modes – giving you a real life ’cause and effect’ experience.
Contents
Different Brands, Different Names ... same thing
The different brands occasionally use a different name or title for the same thing – it’s no different with metering modes.
The metering modes for Sony, Nikon and Canon cameras are:
- Spot – all three brands use this description
- Centre – Sony call it ‘Centre’, Nikon use ‘Centre-weighted’ and Canon use ‘Centre Weighted Average’
- Evaluative – ‘Multi’ for Sony, ‘Matrix’ for Nikon and ‘Evaluative’ for Canon.
Other brands probably use different but similar names and essentially they all operate the same way.
Both Canon and Nikon have a 4th metering mode which they refer to as “partial” and “highlight-weighted” respectively.
I won’t go into any detail about this extra mode but if you have a camera with this fourth metering mode it’s there for a reason and well worth looking into (see your manual) in order to at least understand and know how it works.
Basically this fourth mode is a refined version that meters for a specific light level – such as highlights, and gives a bit more credence to that element of light.
Spot Metering
Spot metering is pretty much what it says – the metering is taken from the selected spot – usually the same area that the autofocus is set to.
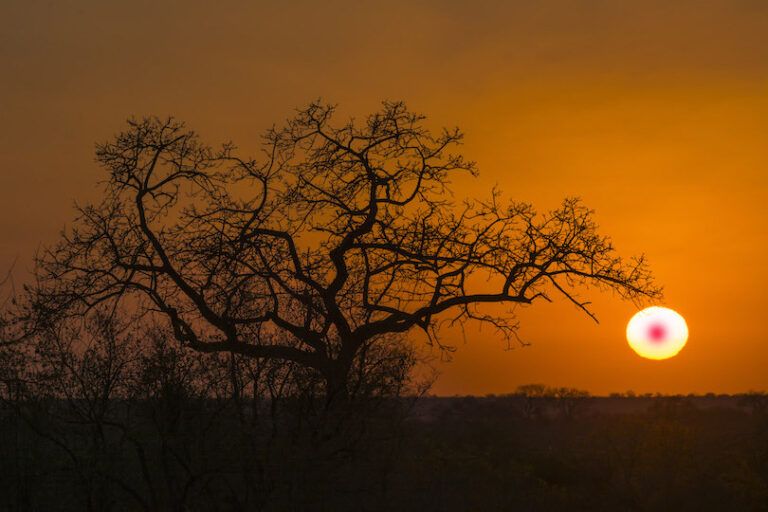
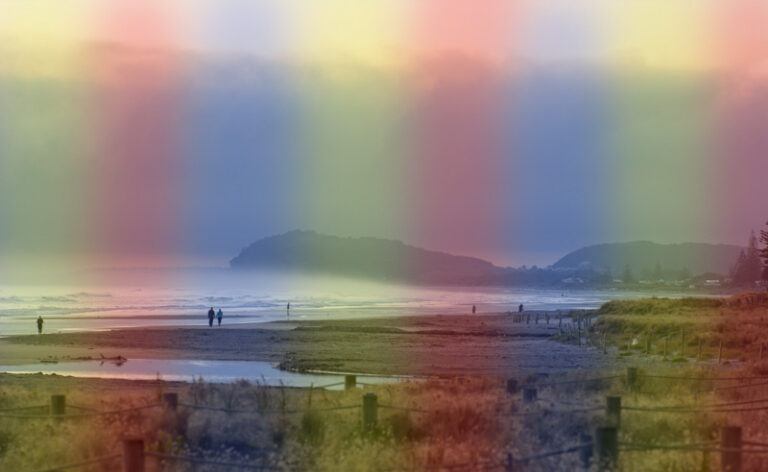
In other words use the auto-focus spots as your exposure guide by placing them over the area you want to expose for. Lock that metering in and recompose and refocus if needs be – as I did in the sunrise image below.
The single spot area is a very small portion of the whole image of between 1 – 4% – it is a fixed setting that cannot be altered.
See also my post on “How to expose for high contrast” lighting conditions.

When to Use Spot Metering
Use spot metering to retain control over essential tones or to be creative.
- Set the exposure from a midtone for best tonal accuracy across that part of the image essential to achieving your aims – for example in portrait photography for skin tones or
- Meter from a highlight (such as a bright sky) or a dark area to create a silhouette or high-key image as required.
- Use spot metering for very bright subjects such as when photographing the moon.
Spot Metering - try this ...
Let’s give it a go and photograph a silhouette…
Grab your camera and head outside:
- Select Manual, Aperture or Shutter priority mode. I shoot in Manual for 99% of my photography.
- Set metering to spot metering.
- Choose a subject that has a big bright sky behind it – a tree, a person or a building.
- Expose for the brightest part of the sky – the whitest cloud you can find.
- Set and lock your exposure – depending on how you have set your camera up this may entail pressing and holding down the AE-L (exposure lock) button.
- Recompose and focus on your subject and press the shutter to take the picture.
The result should be a well exposed sky with your subject as a silhouette in the foreground
Centre-Weighted Metering
In centre weighted metering the camera places more bias, or emphasis, on the amount of light in the centre of the frame and gradually reduces the importance of the light readings towards the edges of the frame.
The diameter of the centre weighted area can be set on some cameras – check your menu to see if your camera has this feature.
On my Nikon D7100 it is under the Custom Setting Menu > b Metering/Exposure > b4 Center-weighted area where I can select from 6mm, 8mm, 10mm, 13mm or average.
Mine is set to average for the very rare occasion that I use this option.
When to Use Centre-Weighted Metering
Centre-weighted metering is most often used by point and shoot photographers and those who almost always place their subject in the dead centre of the frame. Images where the subject is in the centre of the frame generally make for less interesting photos and go against the rule-of-thirds composition rule.
However at times a centrally placed subject does make sense, such as group portraits.
Centre-weighted metering is quite commonly used for individual or couple portraits where the fringe lighting is less important than the light hitting the subject.
Centre-Weighted Metering - try this ...
Let’s take a high-key photo.
- Once again select Manual, Aperture or Shutter priority mode.
- Select Centre-weighted exposure
- Choose a bright day with even lighting and no shadows – overcast days are great, but not essential!
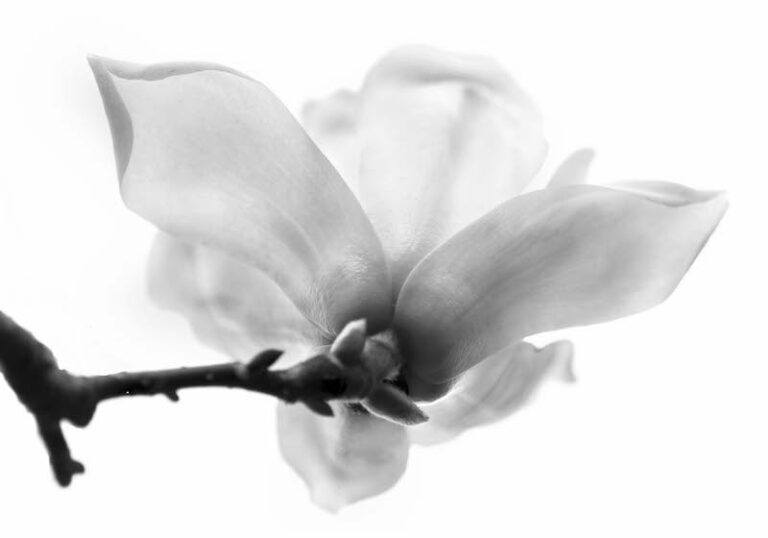
- Place your subject between you and the light source – in the image to the right I have selected to look at a white magnolia with a bright sky behind it.
Low contrast images with light colours such as this work really well for high-key images. - Get as close as you can to the subject to set the correct exposure. You may have to try different distances until you get the result you want. What this does is lessent the impact of the ambient lighting on the exposure meter’s reading.
- Keep that exposure locked in and step away to recompose and shoot.
The result should be a well exposed subject with light spilling over from an overexposed background.

Evaluative, Matrix or Multi-Metering
Evaluative metering is a simple concept with a highly sophisticated algorithm – details that are closely protected as you go from one manufacturer to the next.
Basically the camera analyses the entire frame in bands taking readings from each area/zone and then applying an average to use as the correct exposure.
It also takes into account the focus point you have selected, the distance you are from the subject etc.
It is not a good idea to use evaluative metering in high contrast images as the hightlights will tend to dominate and place the shadows in darkness.
When to Use Evaluative Metering
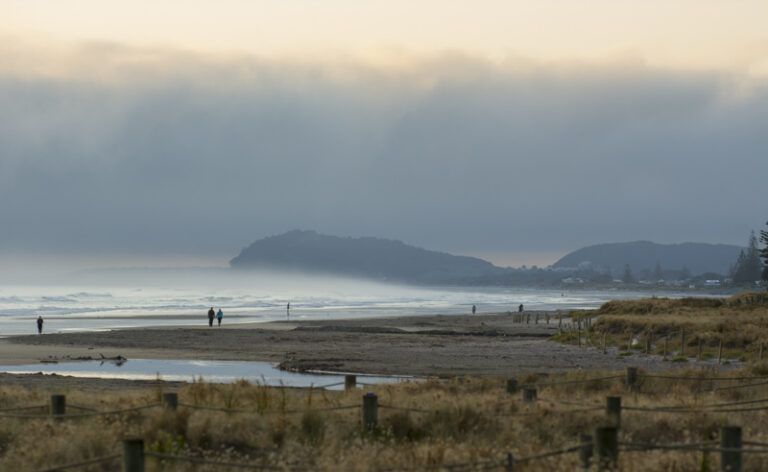
Evaluative metering is best used in evenly lit situations – landscapes are a classic example of when to use them provided the light is even and you don’t have a big bright sky.
This option is most commonly used as the default option for those less experienced with metering modes.
You can basically set it and forget it. The camera will select a good overall average exposure, with as much detail, as the lighting situation will allow for each photograph.
Evaluative Metering - try this ...
Let’s take a landscape photo using evaluative metering.overcast day or place the sun behind the camera and not behind the subject.
- Choose an overcast day or place the sun behind you and the camera and not behind the subject.
- Select Manual, Aperture or Shutter priority mode. Shutter priority is seldom used in landscape unless you are doing a long exposure. Aperture is probably your best option.
- Choose evaluative/matrix metering.
- Frame and expose your image and
- Take the shot.
The result should be a well lit and evenly exposed photo with detail in both the highlights and shadows.
If your sky has overwhelmed the overall lighting and is too bright for the image you have just discovered why we use gradient filters – a subject for another day, but essentially they are used to reduce the light from the bright sky without darkening the shadows and eliminating detail!
Final Word on Photography Metering Modes ... and still more options
I hope you found this article interesting and more importantly I hope you will try the different metering modes to find how they can improve your photography.
Once you understand the metering modes start playing with the exposure compensation options provided by your camera.
The exposure compensation options allow you to further fine tune exposure and adds a whole new dimension for creating even better and more interesting photos.
Has this post helped you understand your camera’s metering modes?
Let me know your thoughts in the comments section below.