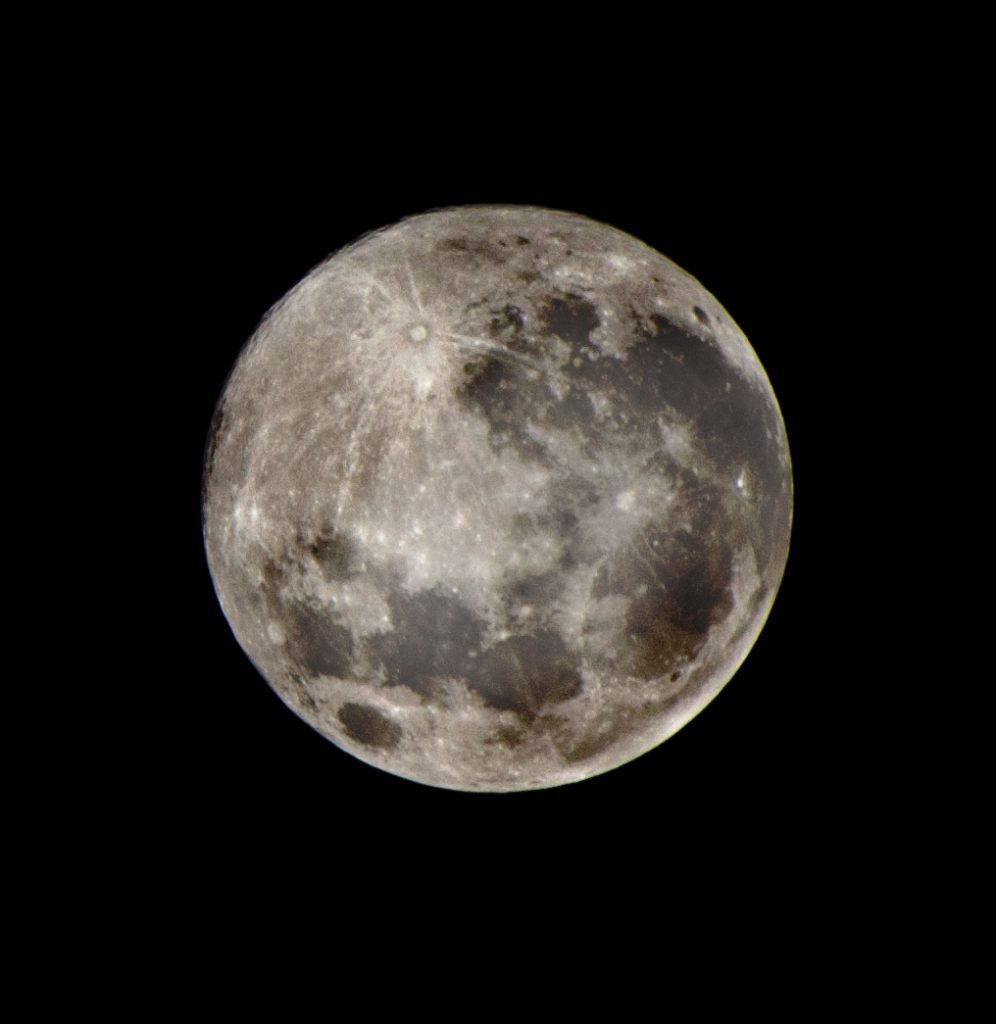
“Can you teach me how to shoot the moon?” someone asked me when I posted the image above on FaceBook.
It’s not even a great image but it is an interesting one – especially when zoomed in.
As result, I thought I would write an article on camera settings and general techniques for taking photos of the moon.
The information may surprise you as in some things it seems counter intuitive.
Contents
Photographing The Moon ... and the Night Sky
A lot of photographers are a bit unsure of what to do when it comes taking photos at night and shooting the moon seems to be one area that terrifies many.
I know it scared me and as a result I shied away from trying. The result is I missed a lot of opportunities and probably lost out on having some fun.
Photographing the moon and the night sky in general needn’t be scary if you understand the basics.
First of all the moon is a long way away and you probably need to use your longest lens. Your longest lens is also probably your heaviest one.
Its essential that you keep the camera absolutely steady as any vibration or shake will be magnetised over that distance.
Always use a tripod a fast shutter speed and the mirror up option or a remote shutter release to avoid any shaking or vibration.
This is essential of you want to take tack sharp images of the moon.
There are other considerations too and I cover some of these below to make your moon shots even more interesting, lifting them into that “WOW” category.
But let’s start with the camera settings …
Camera Setttings for Shooting the Moon
When I first thought about photographing the moomn I was uncertain of how to handle the absolute contrast in lighting.
On the one hand you have this big bright moon surrounded by a high contrasting blackness. So what settings do you use?
That was probably my most pressing question.
Set your camera up as follows:
- Shoot in Aperture Priority – see comments below for aperture setting
- Set your ISO to 100 or the lowest your camera will go
- Use single point metering and meter off the moon’s surface. In most cases that should give you the correct setting. Remember to consider using exposure compensation (EC) – always worth considering and EC to bring out depth
- If you are only shooting the moon you can use virtually any aperture you want as even a setting of f1.8 would work with the moon being so distant.
- If you want something in the foreground, such as a tree or a building, to be in focus you will need to go to a smaller aperture – possibly as high as f16.
Trial and error will get you to the right settings. - Set White Balance to Auto
- Always shoot in RAW

How to Photograph The Moon ... more useful tips
Your settings are dialled in.
You have decided what you want included and in or out of focus.
Your composition and your crop have been determined.
Now to do some fine-tuning that will take your moon photo to the next level:
- Use the longest focal length lens you have to get as close as you can – after all you can’t zoom with your feet
- I recommend the use of a tripod in all moon and night shots. It isn’t always possible or practical but do so whenever you can. BTW “lazy” or “couldn’t be bothered” doesn’t cut it as an excuse. If you are using a small aperture you may be forced to use a tripod as your shutter speed may be too slow to hand hold
- When using a tripod switch vibration control/optical stability/image stabilizer off
- Focus automatically and then switch to manual in Live View
- Zoom right in and manually focus to ensure your image is tack sharp – this is equally true for the tree in front as it is for the craters and edges of the moon
- Use a remote control of shutter release to limit camera shake
- Take a lot of photos so that you have a good selection to choose from
Composition and Variety ... adding the "WOW!"
Take Photographs of All The Phases of The Moon – For Variety
The wonderful thing about the moon is it is out there most nights. Each night is different to the previous or the next night. The moon’s relationship to both the sun and the earth is constantly changing. Each phase is different so don’t just shoot the full moon, an eclipse, blue or orange moon. Shoot them all as often as possible and you will soon become an expert at it.
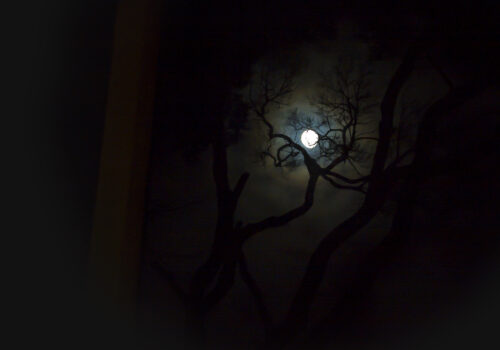
Weather, clouds, stars, city lights and other light pollution all are useful props for making your photos more interesting and, what’s more, they’re free!
Taking a shot of the Moon simply for the moon is OK – but “OK” can be pretty boring and basically the only interest in the image will be the detail of the craters and the edge of the moon. All well and good but it can be so much more than this. In a lot of cases the detail of the craters is the least interesting part of a moon photo in my opinion.
Use things like trees, mountains grass, sea, rivers, valleys, city lights – oh heck I could go on and on but you know what I mean, the options are endless!
Don’t take the photo from conventional positions – move around spending a few minutes to determine what angle, prop, background etc. will make the most interesting composition.
Those old enough will remember the iconic photo of “ET” going home.
Now that was a moon shot!

When to Break The Rules
Sometimes your don’t have the time to do all the stuff I mention above.
The photo at the top of the page is a case in point.
I had just had dinner at my daughter’s place and as I was leaving I looked up through her skylight to see this amazing vision. This is a BIG crop as the only lens I had on me was my 35mm f1.8 as I had been taking family photos during and after dinner and in particular my first ever grandchild who is just over a month old.
“Congratulations Lawrence!” – Awwww thanks everyone. <3 <3
I’m telling you this because I shot this shot contrary to what follows as I didn’t have the ideal lens. I didn’t use a tripod, I didn’t use my live view and I was shooting through glass – pretty dirty glass too.
The result proves that not everything has to be perfect and taking the shot with the gear on hand is better than not taking the photo at all.
Now That You Know How To Shoot the Moon ... get out there and shoot it!
Now You Know How to Shoot the Moon – or Do You?
I know that this can all seem overwhelming but it really shouldn’t be.
I found that the best way to get everything in perspective is to break it down into two phases before I even left the house and that was the settings and the set-up.
Dial in the settings before you go out.
Then it is a matter of making a check list comprising the gear you will need (tripod, remotes, longest lens) – and off you go.
Not too complicated when done like that.
Give it a go and let me know how you do. Comments are always welcome.
Until next time …


I am one of those amateur photographers who just can’t seem to take a good shot of the moon, so your tips are most appreciated.
I can get a good composition but it’s the camera settings I have struggled with so will try your suggestions. I also haven’t been using a tripod, didn’t think it would matter too much but again I’ll give it a try and see how we go.
Thanks heaps, I look forward to learning more from your site.
Hi Heidi.
Its quite surprising how bright the moon really is. Cameras unfortunately tend to get it wrong because of the mass of darkness that usually surrounds it.
And a good tripod really helps. Because of the great distance any slight movement is hugely multiplied.
Thanks for stopping by and commenting.
Lawrencee
Thanks for the information about shooting the moon. I’ve always had problems getting a clear shot of it at night. The pictures always come out blurry. I probably need a better camera to take pictures at night. I did get one nice picture of the moon just before sunrise. I was in the middle of the park where there weren’t many lights and the moon came out clearly.
Hi Kevin. I fully understand your frustrations. What I think makes it really hard to get a decent detailed shot of the moon is the distance. Even the slightest movement is magnified untold times and hence the reason to use a tripod, fastest possible shutter speed, the mirror up function (to remove mirror slap) and a remote control shutter release. And take a series of photos of which one will hopefully be sharp.
Glad you got one good one though and yes light pollution from surrounding city lights etc. are best avoided if possible.
Thanks for commenting.
Lawrence