
A camera monopod has been on my shopping radar for longer than I care to remember. I wanted a one for those times I was patiently (turning to impatience) waiting for “the right moment“.
You know the times I mean – like when you are shooting:
- sports photography
- birds (particularly birds in flight, believe it or not!)
- fast moving children with boundless energy
- wedding and event photography
- any situation where there is plenty of action going on and it gets tiring holding up your camera. Particularly when you have a heavy lens attached
- and the worst one – when nothing is happening. You know it’s going to and you better be ready when it does.
Have you noticed how this always occurs after a long wait when the camera weighs a ton?
There are hundreds of other situations too where a monopod will come in very handy – in fact I have been surprised how indispensible mine has become for almost all of my photography.
I finally took the small financial plunge that has made a big difference to my photography.
Contents
Benefits of Using a Monopod
in this post I will explain my experiences with a monopod since purchasing the Neewer Extendable Camera Monopod Model T222 (the full description for those who would like to check it out).
In several reviews it was clear that the negativity stemmed from not knowing what monopods are.
Customers not doing their homework and buying unsuitable gear because they misunderstood the function of a monopod.
By way of explanation …
One of the reviewers lamented the fact that the Neewer monopod was “useless” because the support stand was unstable.
They went on to say that the camera was severely damaged when they stepped away and the monopod and camera went crashing to the ground.
Turns out they thought the monopod could be used as a tripod!
I suppose it could be used as a tripod with a mobile phone – never tried it myself. I have used my monopod as a light stand with a Yongnuo 560IV speedlight on it in a studio one day, but I was very careful.
Please, please, please – a monopod is not a tripod – don’t go leaving it alone with gear attached to it, hold on to it at all times.
Criteria When Choosing a Monopod
Regardless of what your preferred genre you will have the same basic criteria as any other photographer. The specs will differ based on what you shoot, your gear and your height (and budget too maybe?)
Here’s what to look for.
Important Things to Consider
OK so you need a monopod and have to decide which one would suit your needs best. For me it was for birds and, believe it or not, bees and flowers – stuff I photographed for fun.
I soon found out that a monopod it useful for so many other genres – why I never bought one years ago I will never know!
Particularly useful it was for portrait work – a very popular genre.
3 Essentials specifications to look for:
- Maximum height – a monopod that is 5’6″ (172 cms) will suffice for most of us. Attach a ballhead and a camera and it is good for another foot.
- Weight – aluminium alloy foremost in my mind for less weight without sacrificing strength and durability
- Maximum load – work on your camera body attached to the heaviest lens you will be using.
Getting The Most out of Your Monopod
It is quite surprising how much needs to be considered when researching.
For starters a monopod is simply an extendable pole with screw to thread your camera on.
But used solely like that it is more of a hindrance than an asset – because it is totally inflexible!
Add a Ballhead to Your Monopod
Imagine an inflexible pole with a camera on the end of it – great for absolutely level shots on level surfaces but how often does that happen?
NEVER!!
With a rigid pole and camera you are quickly going to get frustrated with your monopod – quite simply it needs a ballhead for added flexibility.
If you already have a ballhead, get a monopod with a fitting that will accommodate it (most monopods have dual thread size options that will take 99.99% of ballheads).
The one that is perfectly suited to the Neewer T222 monopod is this 360° rotating Neewer Ballhead with a fantastic load capacity.
NOTE: Don’t tighten your ballhead to it’s limit as this will restrict the movement. Have it set firm but moveable.
IMPORTANT: Take the weight of the ballhead into account when calculating the maximum load your monopod needs to be able to handle. Err on the side of caution and buy something that will easily take the load.
Leg Adjustment Locking System – Snap or Screw?
When extending or retracting the monopod decide if you prefer a screw or snap lock system.
Once the height is set for the situation it won’t generally change – so it is a once-off thing where nothing changes often.
Having said that I do think that the screw type take up less space when closed and packed away or when attached to a backpack – something to consider.
Number of Extendable Portions
Just like tripods, monopods incorporate a system of internal adjustable tubes, similar to a telescope, for adjusting the height/length.
The number of internal sections varies from 3 to as many as 6 (I think was the maximum I came across). The more sections it has the longer it will extend.
The Neewer T222 has 4 sections, giving it 5 positions, and is more than adequate for me with a maximum height of 5’6″ (perfect!).
Your Monopod’s Foot
Huh – why would the foot be important?
A good but silly question once I thought about it.
Surfaces vary from smooth studio tiles, rocky outcrops, beaches and a number of different terrains.
A spike is not good on tiles or hard surfaces but excellent for penetrable soil – such as the beach or your garden lawn.
For studio work a rubber footing is great while a support stand is even better. The latter provides the support you need while allowing for tilting up to 20° either way with a 360° rotation.
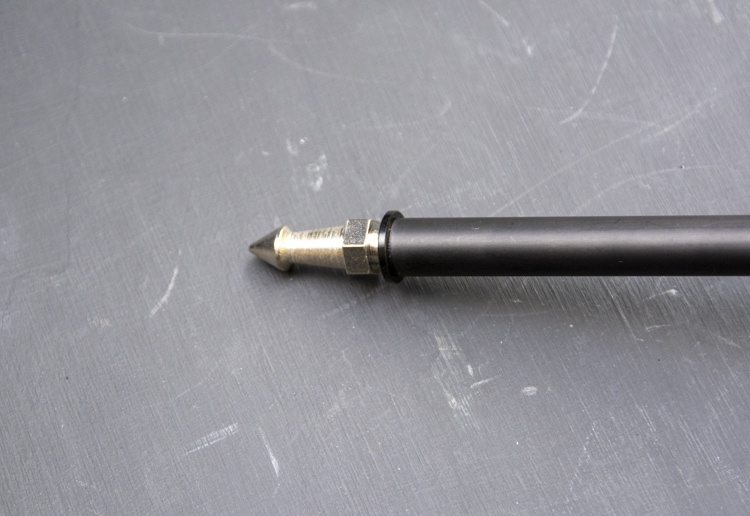
Spike foot – good for soft ground 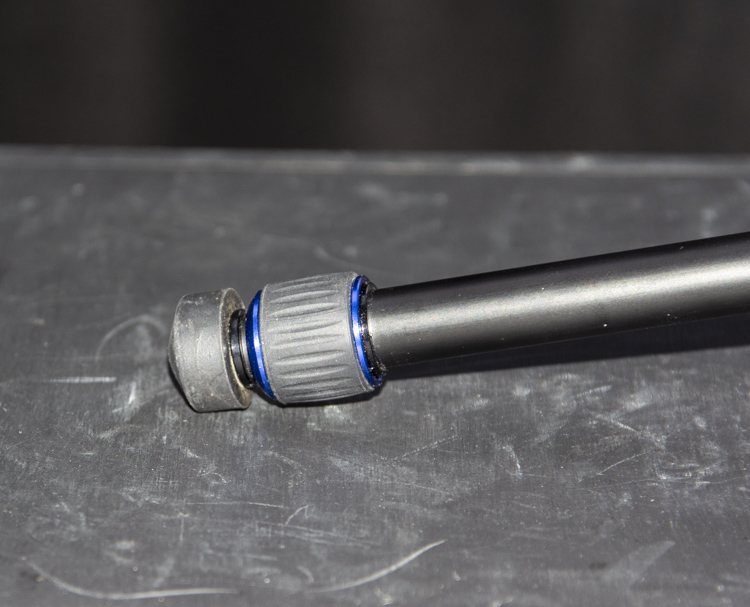
Rubber shoe – perfect in studios or on firm ground 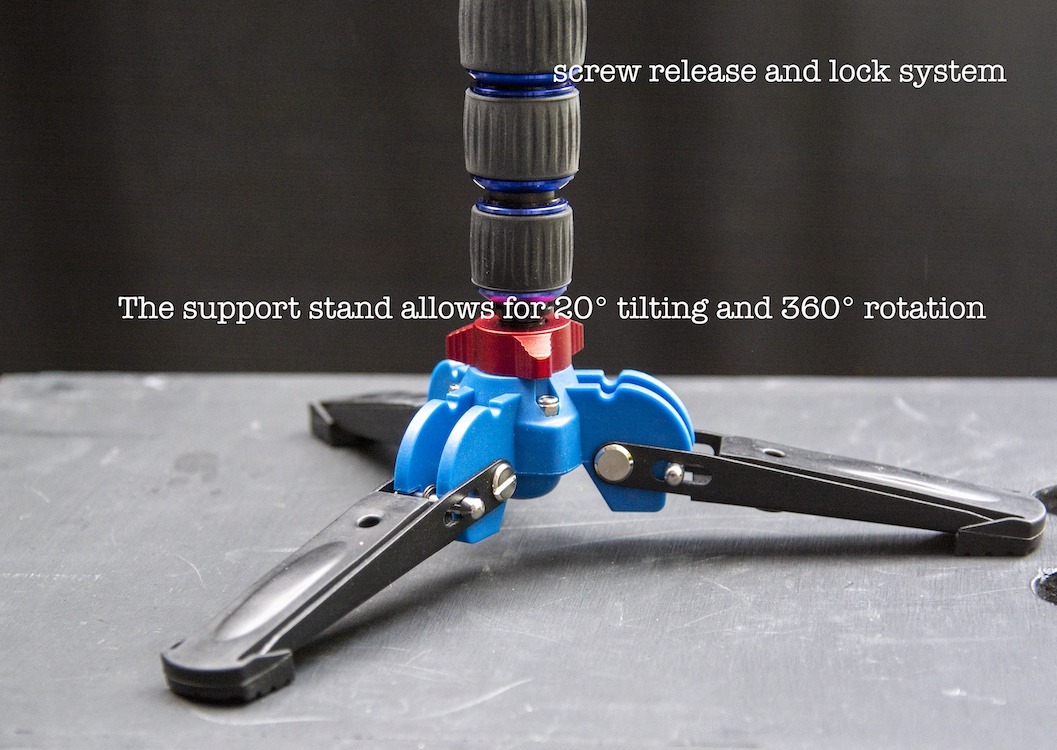
The 3 legged support stand – ideal for studio work
Don’t make the mistake of thinking it will hold the camera on it’s own!
And don’t tighten the ballhead to its tightest – see note earlier.
In short having a number of foot options is a great plus for providing versatility.
Neewer Extendable Monopod Model T222 Specs
The Neewer has the folllowing specifications:
- Minimum and maximum length – 20 to 66 inches (52 – 168cms)
- Maximum load – 11 pounds (5 kilos)
- 5 Positions of leg adjustments with a screw locking system
- Interchangeable foot comprising a spike, rubber shoe and support stand foot for maximum versatility
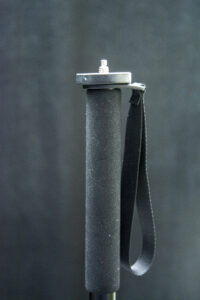
- Rubber handle for a comfortable grip (and it is) together with a wrist strap for added security
- Made from aluminium alloy (carbon fiber) p[roviding a strong durable finish that is lightweight (1.3 pounds) and therefore easy to carry
- Can be used as an alpine walking stick
- Will fit all cameras 1/4 inch and 3/8 inch screw fittings (that’s every camera I know of).
A Final Word on Camera Monopods
Purchasing a monopod has truly been an eye opener for me.
I absolutely love mine and can’t believe I did without one for so long!.
It was such and inexpensive purchase that has made a huge difference to my photography.
My images were tack sharp before but they are even sharper now.
I urge any and all photographers to get a monopod.
Let me have your thoughts below – I would particularly like to hear from enyone who uses a monopod on a regular basis.
Thanks for stopping by.