Landscape photography is one of the most popular genres around as has been since photography first began.
This post covers basic landscape photography tips and techniques, the essential equipment you will need and composition ideas.
Contents
What is Landscape Photography
A tricky question to answer … landscape photography can be anything from a huge expansive scene to an isolated part of a much larger scene.
You can get open-plain landscapes, forest landscapes, beach landscapes, cityscapes, seascapes and much more.
It all depends on what story you, the artist, are trying to convey and the emotion you want to capture. One thing remains constant with good landscape photographs – they tell a story or evoke a mood or an emotion.
In the early 1800s landscape paintings started becoming popular – prior to that they were used mainly as backdrops for portraits and other works of art (the Mona Lisa is a classic example of this) which seems have sparked photographers interest in the genre.
Ansel Adams (1902 – 1984 ) is probably the most famous of all landscape photographers and in his time he had to lug around very heavy gear, at times to remote areas.
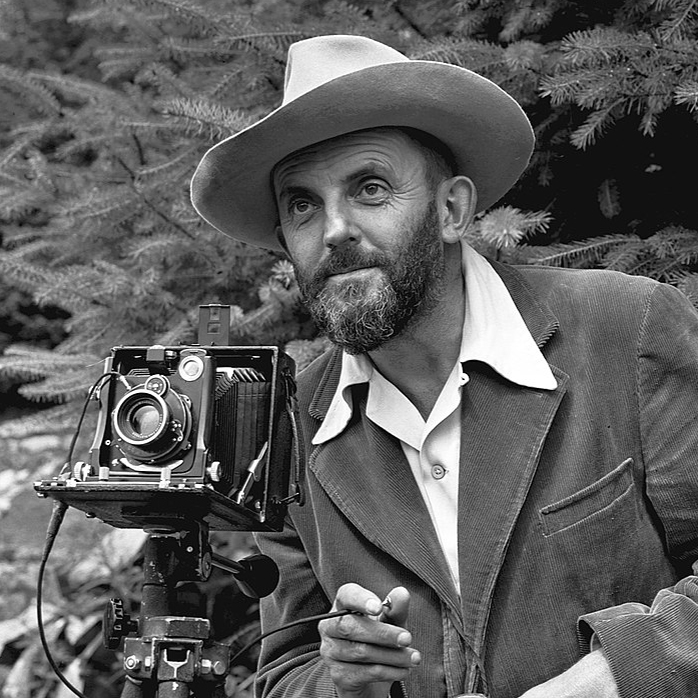
The equipment was that cumbersome and heavy that it often called for the use of mules or pack horses. Today we are in a much more fortunate position with relatively small DSLR cameras, lightweight folding tripods and gear that will fit in custom designed backpacks.
While the equipment has changed, making our hobby and passion so much easier and accessible, the basic techniques and principles behind stunning landscapes have remained timeless
This link will take you to some great examples of the world’s best modern landscape photographer’s works. Its a great reference site to learn about composition, lighting and processing simply by studying these wonderful images. These photos are based on timeless techniques and age-old principles.
Landscape Photography Essentials
Equipment
Besides your camera you will definitely want to invest in:
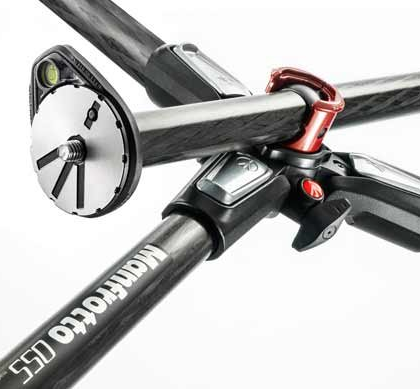
- A really good tripod. With a lot of landscape photography taken in low or fading light (or with filters attached) long shutter speeds will generally be the rule rather than the exception. For these to be perfectly in focus your camera needs to be on a solid base.
Get a fully adjustable tripod like the Manfrotto (pictured here) that can be adjusted down to a very low height for those landscape photos (and there are many) that call for a low angle of perspective.
- A remote control shutter release. Even the slightest bit of shaking, such as that caused by the mirror slap, will result in an out of focus image.
Safety first is a very sound practice to adopt.
Set your camera to “mirror-up mode” and use a remote shutter release to release the shutter. Remote shutter releases are very inexpensive. - Filters. Neutral density filters, polaroid filters and variable density filters are all extremely useful to have for landscape photography.
- Good quality lenses. One cannot overstate the value of good quality lenses (yes they are more expensive but they do hold their value) for landscapes. In the section below you I explain why landscapes are often taken with a small aperture (large f-stop number) and that as a result the shutter speed tends to be slower. And for this reason alone you really do need the best lenses you can afford.
- What lens to use. This will be determined by two or three things.
First and foremost what lenses do you have with you at the time?
Secondly how wide, or narrow, a shot do you plan on taking (don’t forget you can crop or stitch photos together)?
And finally what are you trying to convey?
Using Filters For Your Landscape Photography
Filters allow the photographer a great deal of control in terms of lighting.
Before we get started be aware that every time you place another piece of glass in front of your lens you lose a small amount of image quality because of refraction.
It is for this reason that you will regret buying cheap filters – they are a total waste of money and while it may seem expensive to pay a couple of hundred dollars for a small piece of glass the investment is well worth it.
There are essentially three types of filters we use:
- Polarising filters. As the name implies polarising filters are used to enhance or subdue colours in photos and remove glare or reflections. Polaroid sunglasses work in precisely the same way.
The filter is round and screws onto the end of your lens. All lens diameters are printed on the inside of the lens body at the glass end and are the same size as the lens cap. The polarising filter comprises two sets of glass and once screwed into place the outer piece of glass can be rotated until the desired result is achieved.
Do not place the filter on your lens and leave it there thinking that just because it is attached that is the result you get. You do have to rotate it whilst looking through the viewfinder to see the effect. Once you are happy with the result continue as if it isn’t there. Because it is an extra piece of glass and usually slightly darker you may lose a stop or two and need to adjust accordingly.
Do not leave it on your lens as a lens protector – there are clear glass filters available for that purpose.
Here’s a link to 86mm Hoya circular Polarising Filter – Hoya are a well known and reliable brand.
Note: With all circular filters – the type that screw on to the end of your lens be sure to buy the right size! - Neutral density (ND) filters. ND filters are like standard sunglasses and block light from entering the lens. These are useful on bright days and for long exposure. They come in a rather complex and hard to understand numbering system and to complicate things further not all the brands use the same numbers.
ND filters come in round or square/rectangular options. The round ones fit on the front of the lens like the polarising filters and the square ones require a bracket as per video below. For the square ones the bracket itself is easily mounted on to the lens.
So why are they useful?
By using ND filters you can stop down on your shutter speed for longer exposures – they are often used in those dreamy seascapes that you keep marvelling at. The amount you stop down is determined by the number/rating system I mentioned above. They range from 1 full stop to as many as 10 stops. As the glass gets darker you will find you need to focus before putting the filter on as you won’t be able to see through the glass at all. Don’t worry though your camera will capture all the detail with the shutter open for the required length of time. It does take some practice and getting used to but the effort is well worth it. - Variable Density Filters (VDF). These serve exactly the same function as ND filters in blocking out light but only come in the square or rectangular option for reasons explained below.
VDF have a graduating (hard or soft delineation) whereby they go from completely transparent to dark or very dark over the length of the filter.
Attach them using the bracket and then adjust the height of them (see video below) to line up with where you want the light entering the lens to begin being blocked. For this reason they do not come in a circular option.
They are most effective where you have a very clear difference in light, such as a sea horizon, where the sky is ultra bright and the foreground not as bright.
The video below gives a better visual description.
Note that all filters can be used in combination with each other but, as stated above, every additional layer of glass causes a small amount of refraction and distortion. It is preferable to use one appropriately graded filter.
Composing Your Landscape Photographs
Composition is obviously a personal choice but generally the rules (such as rule of thirds) should be borne in mind.
How much of the photos do you want in focus, do you want to isolate a portion of the image or have both foreground and background interest in sharp focus? The latter option is considered by many to be a standard technique.
Maybe you don’t want anything in focus – the options are endless and entirely up to you.
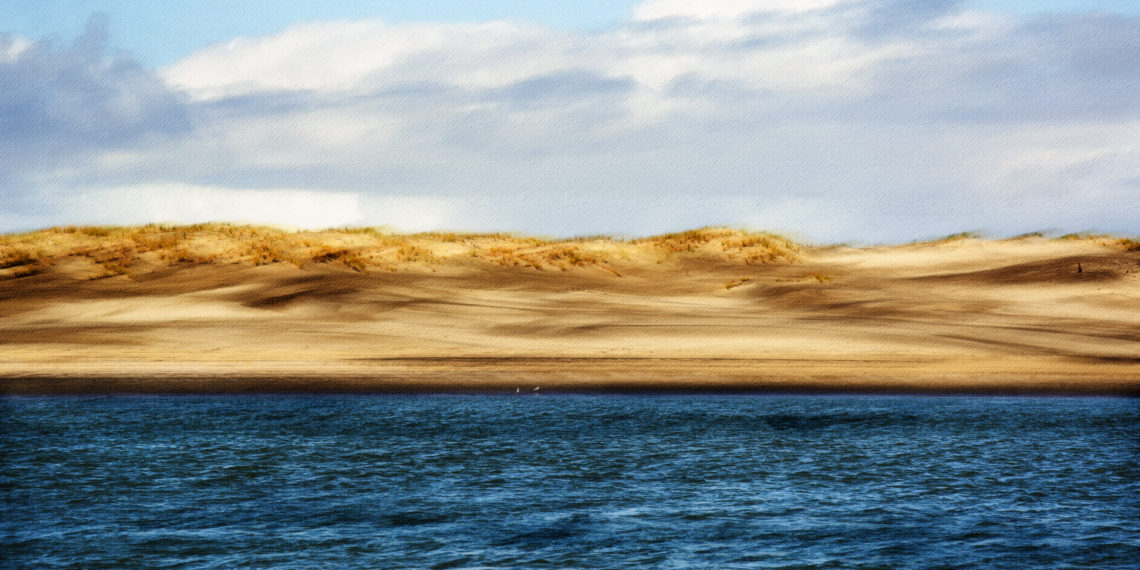
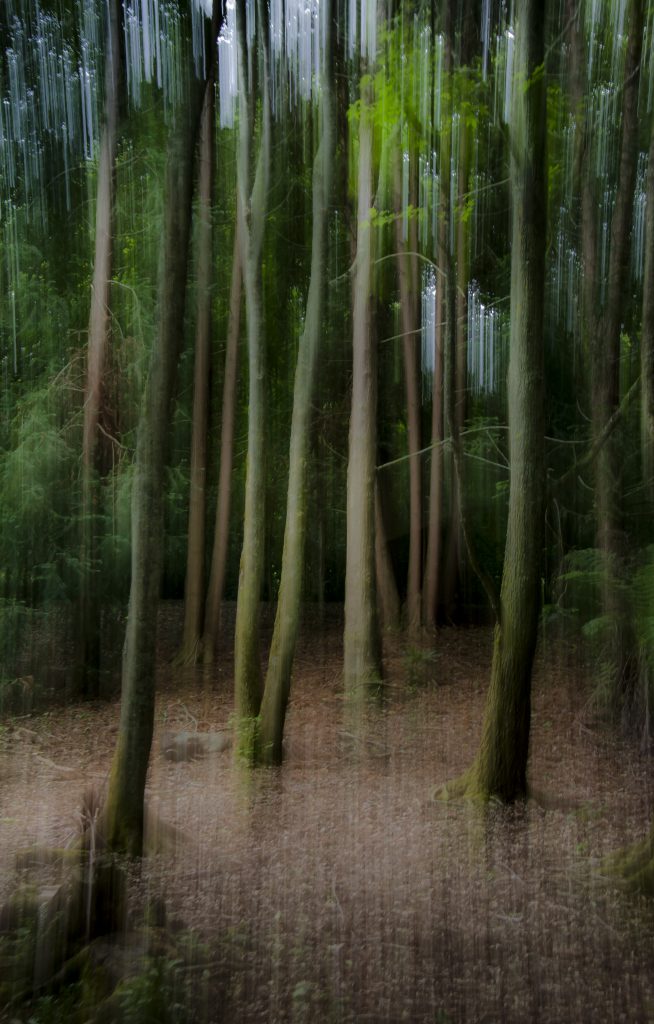
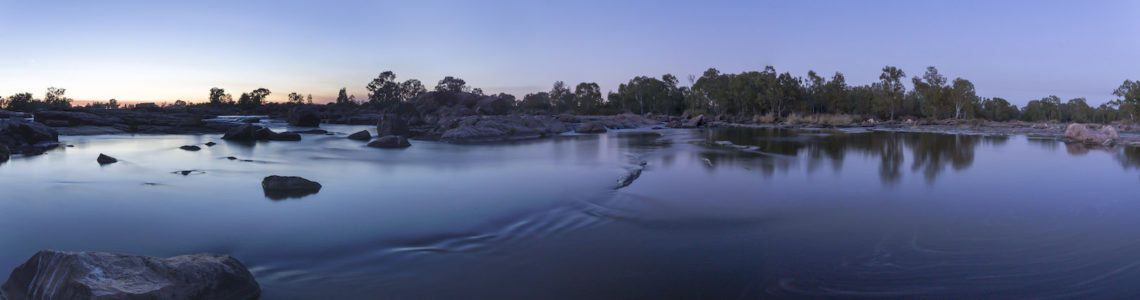
Both of the photos shown here were shot and processed for a painterly look. The one above uses the rule of thirds to good effect while the one to the right is intentionally blurred by moving the camera vertically while simultaneously pressing the shutter release button.
To achieve sharp focus throughout you need to use a small aperture, a large f-stop number of at least f16 depending on your lens and the scene.
A small aperture means a longer exposure, further compounded if using an ND or VDF filter, and the reason you need a tripod for landscape photography.
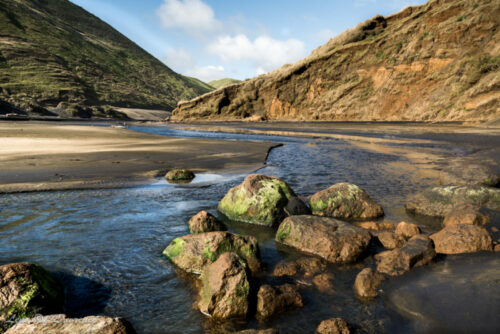
Make sure your have balance in your image from left to right and front to back. The image at the top of this page is a good example of a landscape photo with foreground interest and leading lines drawing you to the back of the image and beyond, while maintaining a good balance from left to right. The last hill in the image, the one just poking out above the “V” of the hills adds a further dimension and depth to the overall image while the rocks in the foreground provides an anchor for depth perception.
Try to get similar balance in your images or throw all the rules out and use a soft front or rear focus to draw the eyes to a particular focal point.
Camera Settings
Landscape photography is essentially a photo of a static subject and once you have the camera settings dialled in they are pretty constant. The shutter speed will need to be altered for the changing light.
Camera settings For “Blue” and”Golden” hours (see below).
With this time of day you will have quite dramatic changes in the light as your only variable and it is this dramatic lighting that makes these hours so attractive to landscape photographers.
- Use a tripod and set your camera to manual mode
- A small aperture for greatest depth of field
- A low ISO. The lower the better but there will be times when the light is too low and you may have to increase the ISO quite dramatically.
- A slow shutter speed to allow for the low iso and small aperture
I would suggest shooting in manual mode with white balance on auto.
Once you have the ISO and aperture set it is simply a matter of selecting the right shutter speed to get the correct exposure.
Camera settings for times between sunrise and sunset.
- On a tripod set your camera to manual mode.
- Settings will differ from subject to subject and with different lighting conditions.
- The old “sunny 16 rule” often still applies and is a good starting point;
on bright sunny days ISO 100, f16, 1/125th second shutter speed. - Try to avoid shooting at that time of day when there are harsh shadows, unless it is the drama in the shadows that you want to use to enhance your photo.
- In all likelihood you will need to use filters (see above) to compensate for the slower ISO, smaller aperture and abundance of light.
Best Time to Take Landscape Photos
The bad news is the best time to take landscape photos is when most people prefer to be in bed!
Hardcore landscape photographers are a breed of their own and love getting up early to welcome the “blue hour” or going out in the late afternoon to catch the last rays during the “golden hour”.
Both times are invigorating and well worth making the effort.
These are ideal times for dramatic lighting and they occur at opposite ends of the day.
The blue hour is from half an hour or so before sunrise to just after the sun has risen while the golden hour is an hour or so before and after sunset.
You don’t have much leeway as the sun waits for no man so be sure to get there early and set your gear up ready for the brief opportunities that will come your way – and there are usually plenty with dramatic light changes over a very short period of time.
Perfecting Landscapes
Perfecting your landscapes takes practice and experience.
We have two great lighting options at the start and end of each day and all sorts of variables in between.
There really is no limit to the diversity and opportunities offered with landscape photography.
Landscapes are a great reason/ excuse (if you ever needed one) to get out and shoot. and it is the ideal time to practice and master your gear. Practice often and you will soon become very proficient at it.
Go out and get some amazing photos that you can print and hang with pride in your own home.
Until next time!
I actually tried my hand at landscape photography about a year back after receiving a great camera as a present off my partner. Being the artistic type (I’m a musician) I thought I could walk straight into the world of photography and nail it with ease…
I was wrong.
I live in a wonderful area for scenery – on an estuary in a fishing village in South Wales – in every direction there is a wonderful photograph just waiting to happen.
Unfortunately after reading your article I realise where I was going wrong – I wasn’t using any sort of tripod for my shots, and I was using the lens that came with my DSLR.
Could you maybe point me in the direction of a budget tripod – just to get started with? Also, do lenses come in packs of various sizes or do you have to purchase one at a time?
Hey Chris (fellow artist)
I was in Wales a long time ago and loved the country – the old castle ruins especially were fascinating. There’s just something about real history that grabs me. Unfortunately I wasn’t into landscapes back then. Pretty sad really.
I fully appreciate what you mean about being an artist and thinking something in a related field will come easy. me I can’t play a single note of music and struggle to draw a stick man.
I have some good and some bad news for you:
First the bad – I would never recommend a “budget” tripod to place an expensive camera on. Cheap is usually expensive so until you are really into photography and can afford something like the Manfrotto …
Go for the good news. Not quite as versatile but versatile in its own way carry a bean bag to set your camera on. Sure you can’t adjust height and stuff, unless you can find a sturdy post, pole or fence to put it on (car roofs and bonnets work well too), but they are sturdy and your camera won’t fall off and get damaged.
Lenses do not come in packs, nothing much in photography does (other than cleaning cloths), and are purchased individually as they are all specific for different situations. You do get lenses that are suitable to a variety of situations but with versatility comes compromise.
Thanks for your comments and hopefully you will soon be posting some Welsh landscapes for the world to admire
Sincerely
Lawrence
Thanks for such an instructive article.
I must say that I enjoy going to places where I can take photos, I find it peaceful and relaxing a great way to calm nerves and emotions.
Although I am not a professional, I prefer not to use cheap equipment. Good equipment can be expensive but I think it is a good investment and shows in the photos.
Hey Daniel
Thanks for your comments.
I absolutely agree that photography is meditative. I can spend hours looking at things through a viewfinder and snapping away. Sometimes I don’t look at the photos I have taken for weeks – and then when I do they are a pleasant surprise and memory of hours well spent.
Yes good equipment definitely helps with good photos if the person behind the viewfinder understands the art. Thanks for popping by.
Lawrence
I found your writing both easy to understand and was very informative. Your advice with regard to the use of filters will be very useful in my attempt to distinguish my landscape thoughts. The information on stabilizing the camera is especially meaningful for me as I have a slight tremor.
I look forward to further tips on other aspects of photography.
Hey Roger
Thanks for your comments and I am sorry to hear about your tremors.
That would certainly prove a challenge in photography. Get yourself a good monopod (can double as a hiking pole for those uphill climbs) and a good tripod. Oh and you can get a tripod that can be converted to a monopod simply by removing legs. They’re not as strong as individual monopods and tripods so need a little more gentle handling.
Once you start using filters you’ll never look back.
All the best
Lawrence
It can be very heavy to bring all the equipment to shoot a great photo. I am searching for an all in one unit that I can took great photos. I am a traveller who is always on the move. Would you recommend me the most important gear for me? Maybe I will lose some extra special photo effect when I did not use everything.
Hi Kit
It’s impossible to answer your questions without knowing a bit more about what your intentions are.
For example do you shoot landscapes (which I presume it the case, as you commented on this page) only or do you also photograph other subjects?
If weight and bulk is an issue then I would get a light travellers tripod (just make sure it is sturdy enough to hold your camera) and a versatile lens such as a 18-300mm. With such a wide zoom range you will suffer a bit of image quality but you need to weigh up your priorities.
To be perfectly honest there is very little wrong with the highly under rated, so called, kit lenses that come with most cameras these days.
Hope that helps.
Lawrence