Camera f Stops Explained or WT f …
Strictly speaking there is no such thing as “camera” f stops; f stops refer to the aperture of lenses and not the aperture of a camera.
Just thought I would clear that up.
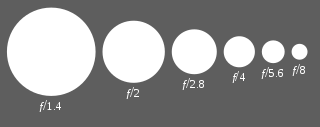
f Stops cause some confusion, primarily because the numbering system used to describe them is counter-intuitive; a small f stop number means a wide open aperture and a large number refers to a small opening.
You shouldn’t really worry about the term “f stop” too much.
Yes it can be confusing but hopefully by the end of this post you will accept that it is simply a numbering system that describes a particular setting.
What the setting can do for your photography is far more important than the strange numbering system it uses.
We’ll get into that in a minute but first I want to cover stops in general because there are more than just f stops used in photography
Contents
f Stops Explained - In simple terms
As mentioned above the confusion with f stops arises from 2 factors:
- The actual numbering which seems bizarre and quite random.
- The way the numbers are used – big means small and small means big – there’s that “what the f?” again.
What the f Stop Numbers Mean
The numbers used in f stops are simply fractions between the focal length of the lens and the aperture (opening). Don’t even worry about it if you’re not into mathematical detail – What the system is called isn’t important. It was originally decided to put an f in front of the number to denote that is was a fraction.
We’ve been stuck with it ever since.
The following is a table of the more common apertures in whole increments (i.e. each step down lets in twice as much light):
- f 32 … ( a tiny pinprick of light – very seldom used as virtually no light enters the lens)
- f 22 … ( small aperture used in very bright situations)
- f 16 … (often used in landscape photography for greater depth of field)
- f 11 … (As for f16 above)
- f 8 … (good for everyday use providing a great depth of field)
- f 5.6 … (as for f8 but depending on the lens also excellent for *bokeh)
- f 4 … (lots of light with shallow depth of field and *bokeh)
- f 2.8 … (a partial increment slotted in here as it is probably the most sought after aperture for sharpness and gorgeous *bokeh)
- f 2.0 … (huge amount of light and dreamy *bokeh)
- f 1.4 … (wide open aperture not often available on lenses)
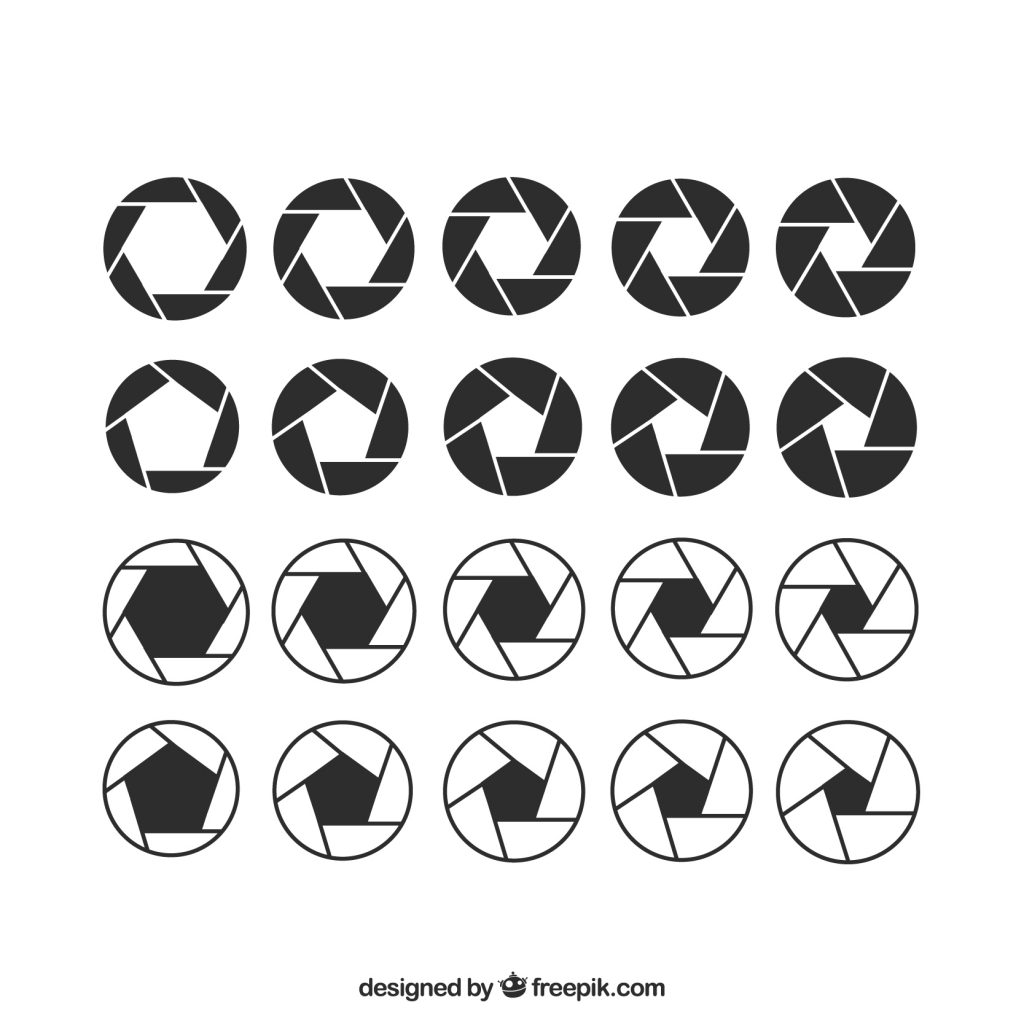
* My comments on bokeh are generalising; much will depend on the lens quality and focal length.
Some lenses are better than others for bokeh while zoom lenses provide more compression, resulting in even softer bokeh.
Big Means Small and Small Means Big
As you can see from the above table a big f number such as f 8 provides a smaller aperture than say f 2, while a small aperture number, such as f 1.4 is much bigger again and admits a lot of light.
Getting down to f 22 the aperture is really small and a higher ISO or slower shutter speed (the other stop controls on a camera) or a combination of both would be needed.
I tend to think of an aperture as a large window with curtains (which is exactly what it is).
Assume you are in your lounge where you have these big windows with gorgeous drapes/curtains (it doesn’t matter if your drapes need replacing we won’t tell anyone).
With the curtains wide open the light pours into the room brightening everything up. Now draw the curtains so that only half, and then a quarter, of the light comes in. The room obviously get’s darker as you block out the light.
Guess what happens to your eyes when you do this.
The pupil automatically opens allowing more light to enter your eye to compensate for the lack of light in the room. If you then open the curtains again your pupil retracts reducing the amount of light entering your eye.
Your camera and the settings work the same way. If you adjust one thing you need to adjust something else to get the correct exposure.
The shutter speed, ISO and f stops are all used together to control your exposure. Once you have the correct exposure you are ready to take your photo. If for some reason you decide that you need to change one setting (say the shutter speed because it is a fast moving subject) you need to make an adjustment to one or both of the other to retain perfect exposure.
To understand more about this study up on “The Exposure Triangle”.
The Best Part About f Stops - they control depth of field!
This is probably the best news on f stops – the f stop not only controls the amount of light that enters the camera, but also how much of the image is in focus from back to front – known as the depth of field.
Depth of field is an important part of the artistic side of photography.
In portraiture, for example, if you can enhance the bokeh (soft background) to allow your main subject to stand out your photos will produce that “WOW” factor.
For some reason as I wrote that I thought of the Mona Lisa – probably the worlds most famous painting – and I cannot remember what the background is. I think mountains?
Anyway the point is Leonardo wanted us to look at her and her smile not the **background behind her (although I imagine that also tells us something about the image).
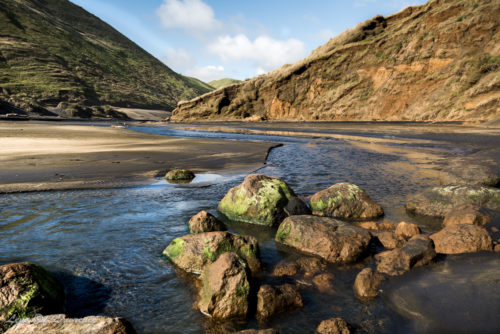
Alternatively in something like landscape photography you want as much of the foreground and the background to be in focus. For this you need to select a small aperture (large number) such as f 11 or f 16 as I did in the landscape image pictured above.
Controlling the depth of field is one of the main reasons photographers select ‘Aperture Priority’ as the shooting mode. Those that use it prefer to get the depth of field right and then adjust everything else accordingly.
To do this correctly you do need to understand your camera and lens combination.
** I just had a look at the Mona Lisa and it is a landscape background which seems to indicate some rural spot in Italy.
And More Stops - its not just about f stops
It’s all about getting the correct exposure.
The term “stop” is used to describe the amount of light entering a camera. There are a number of ways to adjust this in order to get the correct exposure.
There are stops in shutter speeds, ISO settings and aperture selection. They all use a system of numbering and the aperture’s f stop is just that – a numbering system.
Let’s go through each one so you understand them a bit better.
Shutter Speed Stops
No confusing numbers here.
Think of stops as being increments along a path. Each stop equates to either double the previous stop or half of the next one.
Using a shutter speed of 1/200th of a second as a starting point a full stop either side of this is 1/100th of a second or 1/400th of a second.
- It becomes obvious that a shutter speed of 1/100th second will let in twice the amount of light as 1/200th because the shutter is open for twice as long.
- 1/400th of a second will let in half the amount of light of 1/200th second because the shutter is open for half the length of time.
ISO Stops
ISO setting work exactly the same way. They are increments of double or half the previous one or the next one respectively.
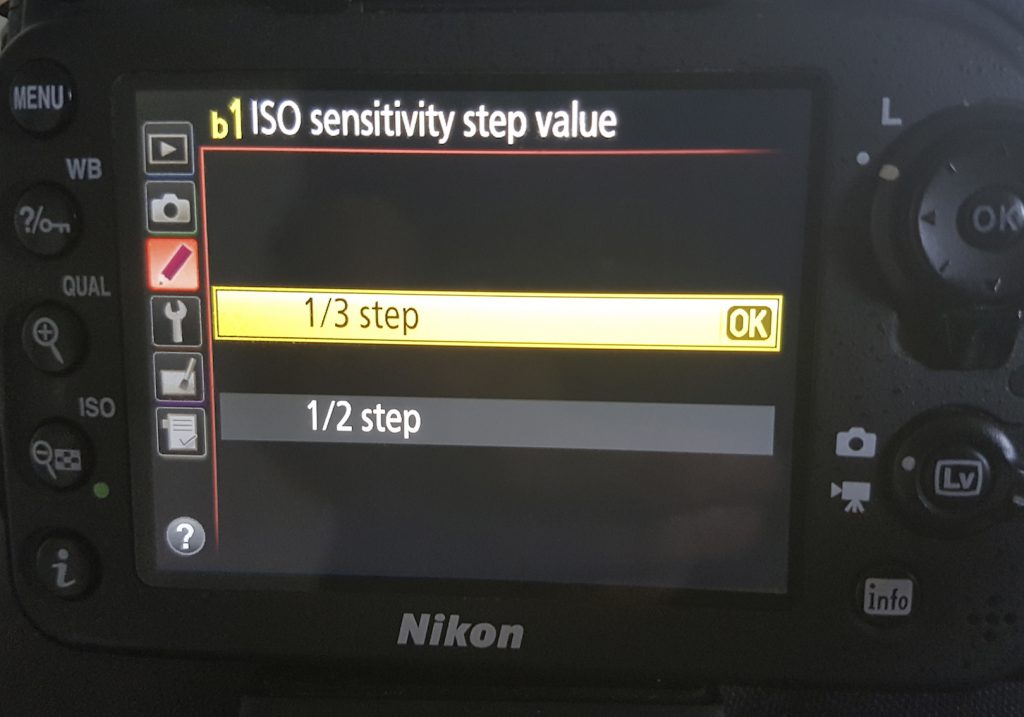
NOTE: Modern DSLR cameras have the ability to adjust stops in smaller than whole increments. Cameras usually ship with 1/3rd increments preset in the menu. If you want to change these settings got to:
Menu > Custom Setting Menu > Metering/Exposure > ISO sensitivity step value (option of 1/3 or 1/2 on my camera your camera will probably be different so just look for it in menus.) See also my post on Exposure Compensation.
An ISO of 100 is 1 stop away from one of 200 which is, in turn, 1 stop away from 400 and so on.
The lower the ISO the more light is needed to capture the image. If you need more light for a specific ISO then you need to slow down the shutter speed to allow a longer time for the light to penetrate or you can use a wider aperture – see below for the dreaded f-stops and aperture settings.
ISO is the measurement used to describe the sensitivity of the sensor to light. The risk one takes of using a higher ISO (more sensitive setting) is that the resultant photo could be noisy (grainy as it used to be called). However, the noise can be greatly reduced in post-processing and I for one seldom every worry about it and happily shoot at ISO 6400 without any problem.
The Final Word on f Stops - using them
Now that you are clearer on f stops and the role they play, together with the other camera stop settings, I suggest you pick up your camera and try out the different f stops to see the impact on the image you are taking.
Look out in particular for the two things that the f stop impacts on, namely lighting and depth of field.
Can you notice the difference?
Let me know in the comments below please.
I’d love to hear your thoughts and share your experiences with you.

This wasn’t an article I was looking for but it was an articled I needed to read! Thanks for sharing.
Haha Thanks Josh. Its always nice to capture passing traffic.
let me in on a secret and tell me what you were looking for – maybe I can write a post just for you?
Sincerely
Lawrence
Alright! Well I would like the Shooting With High ISO one and I suppose I need to know more about shooting subjects in high contrast conditions. I have tried taking pictures of objects in shaded areas with a sunny background and the subject always ends up very dark. If you could cover those topics that would be pretty cool.
Also, I didn’t get an email notification from your response to my last comment on your site. This seems like a ovesight that ought to be corrected, not that I know of the solution. I just figured that since I’m putting in my email for each comment that I would get a notification.
Thanks!
Hey Josh – thats a great idea
I will do a shooting with High ISO blog and also one about shooting subjects in shaded areas. I’ll kick it about to come up with a title and am thinking I may combine the two as they are quite similar.
I did cover the shaded foreground/bright background part in my Exposure compensation article. Did you read that one?
Thanks for alerting me to the fact that you do not receive notification of my responses – I’m working on a plug-in for my theme to do this. You pointing it out is a big help – thanks.
Cheers once again
Lawrence
Some very interesting information here, I used to have an old Practika SLR camera and used to enjoy messing around with the settings even if I had no idea what they meant!
Trouble was, in those days you used to have to wait for the (very expensive) processing to be done before you found out what effect it had.
Some brilliant photographs on this page, I’d love to see more.
Would you advise taking the same shot with a number of settings if you have the time or would you just sort things out with processing software afterwards?
Hey Spargop.
Get yourself a camera – developing is basically free these days and you can just delete the ones you don’t like!
But this wonderful ability to shoot as much as we want has also led to some sloppy photography – in the past, because it was so expensive, we were a lot more careful.
Taking the same photo with a different bunch of settings is always a good idea as you learn a lot from the results. I have found many a preferred photo using settings I didn’t think would be ideal. However I never take a photo knowing that I can fix it in post processing afterwards unless I have no option, which does happen more often than I would like. I prefer to get as much right in camera as possible to avoid post processing times.
I wonder what your Practika is worth today – there has been a big interest in reviving film photography and 35mm SLRs are once again in demand.
Hey thanks for the compliments on the photos – I really appreciate it.
And thanks for commenting.
Lawrence