Do you want to get better at photography?
I clearly remember my frustrations when I started out and looked at my photos, compared them with others and the images I wanted to achieve and realising that my photography sucked.
I was my harshest critic and most of us are but if you want to improve what is the shortest and fastest way to do so?
I had no idea where to turn to learn how to get better at photography.
If you’re in a similar situation then hopefully this post will point you in the direction where you can learn to improve your photography without laying out a fortune or having to give up your normal life.
WARNING:
Haha the fact that you have taken up photography may already have taken over your life (and cost you a small fortune).
Hopefully these tips on how to improve your photography skills will fit in with your lifestyle.
Let’s Get started …
Contents
Read Your Manual - You Have to Know Your Camera
Did I hear you groan?
I know the manual seems to be the most boring thing you could ever pick up. It seems to be full of technical terms written in Greek (with apologies to my Greek friends), but the truth is it is full of information that even if you don’t understand it now it will eventually make sense.
What I used to do is check the camera body and decide which button I wanted to learn more about.
Look up what that button does and then play around with it to see the different effects.
Do this every day or week with a different button.
And remember that some buttons have different functions if held down with another button – you’ll find all this out by reading that manual.

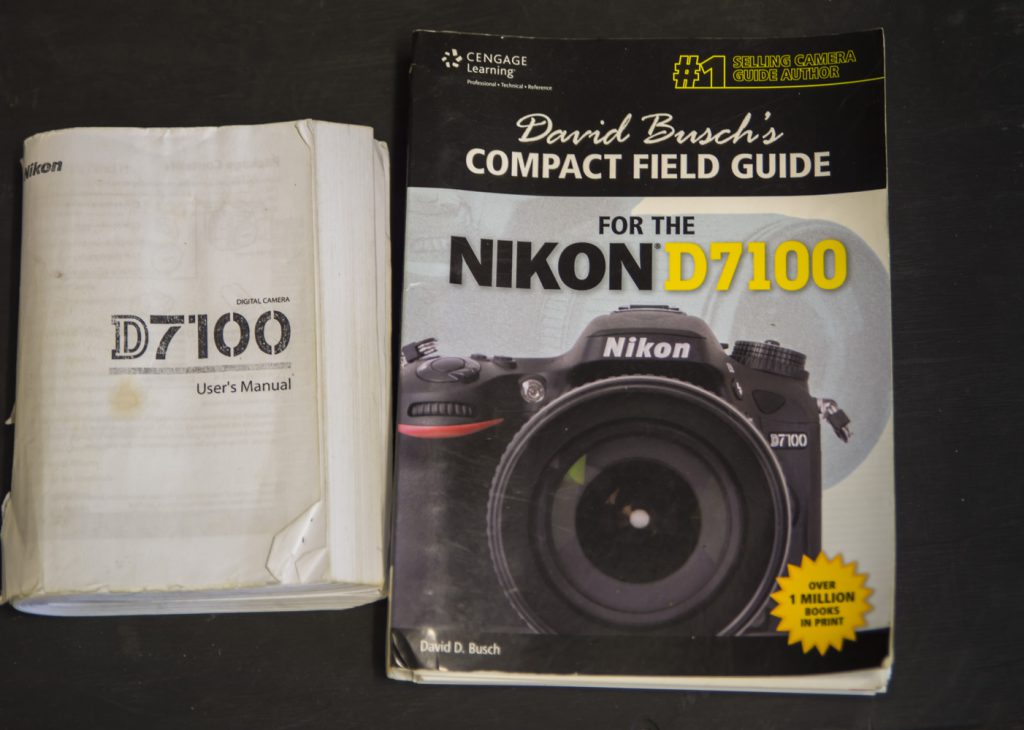
If your manual is too technical for you go search for a “For Dummys” version of it. I found the “Compact Field Guide for the Nikon D7100” far easier to understand than my manual.
Once you start understanding the capabilities of your DSLR that manual you hated so much becomes like a thriller and you won’t want to put it down.
But photography is not just about the technical side of things. You need to understand that the camera is merely a tool.
Here is a great video on the visual side of things.
Memorise Your Camera's Layout - until you can find the buttons blindfolded!
Know exactly where each button is and what it does – then learn to change settings on the fly!
OK this is a tough one because it gets kinda boring. But when you get to the boring point you know you’re getting better at it.
Firstly set your shooting mode to one of the manual settings:
- Shutter
- Aperture or
- Manual
I shoot in manual but it may be easier to start off in aperture mode – I think the majority of photographers shoot in aperture anyway as it controls depth-of-field.
Secondly familiarize yourself with the location of the following buttons/wheels:
- Shutter speed adjustment (usually the back wheel locate where your right thumb would be)
- Aperture adjustment – can be the same as the shutter adjustment wheel but may or may not need another button pressed simultaneously, or it could be the front wheel located next to the shutter release button. The deciding factors as to the aperture control is determined by the camera model (they all vary) and the mode you are shooting in.
- ISO adjustment – usually a button on the back and adjusted with the shutter wheel
- White Balance adjustment. I always recommend you set this to auto (you can read my post on WB here). It could be an external function or a menu function depending on your model.
Play around with that lot and see how changing them changes what you see in the viewfinder. You should see the exposure light moving to an overexposed state (indicated by the exposure meter bars) going to the + or – side as you make adjustments.
Now close your eyes and play.
- Adjust the shutter speed by X number of stops one way and then the other (if you don’t understand what a stop is refer to your manual)
- Adjust the aperture up and down – again these are measured in stops.
- Adjust your ISO up and down – you got it, this is in stops too.
To understand how these three functions work together you need an understanding of what is known as the “exposure triangle”.
Essentially if you adjust one setting you need to adjust at least one other. So if you increase the shutter speed you either need to increase the aperture, to allow more light to reach the sensor, or increase the ISO, to increase the sensitivity of the sensor, or a combination of both.
Conversely if you change the aperture to decrease the amount of light entering you may want to slow your shutter down to allow it to enter for longer or reduce the sensitivity of the sensor by lowering the ISO.
This all sounds complicated in writing but becomes clearer as you play with your camera and settings and after a while becomes second nature.
It’s the old story of the more you practice the easier it becomes.
Do these exercises as often as possible – they can be done in front of the TV or while you are lying in bed at night.
Take Lots of Photos To Really Get Better At Photography
By that I don’t mean put the thing on rapid and blast away like you are in some sort of contact in a war.
Set yourself a goal of taking your camera with you wherever you go and having it to hand. If this is impractical then take photos with your phone camera.
It doesn’t really matter as long as you are in the “photo-taking mode” no matter where you are. Believe me you will see an improvement in your skills.
But photography is not just about the technical side of things. You need to understand that the camera is merely a tool.
Here is a great video on the visual side of things. Bear these points in mind as you tackle some of the projects recommended in the next paragraph.
Fun and Challenging Projects to Improve Your Photography
There are a number of simple, yet challenging projects you could undertake that would greatly improve your photography skills.
During the Covid Lockdown in March 2020 I came up with a few more ideas – you can read about those here.
Here are a few to get you going now and that you can do in the future.
Project #1 - 365 photos in 365 days!
Make a public statement to take at least 1 photo per day for a year and post it online on a forum, FaceBook, Pintrest or similar.
The public statement will commit you and your friends and colleagues will likely hold you accountable as they anticipate each day’s photo.
Note it must be a new photo taken on that day and not some photo you took a while ago. That’s a rule you have to stick to otherwise don’t bother – you’ll only be fooling your self.
One is the minimum – their is no limit so if you want to do 10 per day – all the better.
I did this for a year and the improvement in my photography was dramatic.
And no, you do not have to wait for the 1st January to get started – start today!
Project #2 - 52 Photos in a Year
As above but at least 1 photo a week for a year – this is a watered down version of the 365 project for those with less time or drive?
Obviously a photo a day will get you there quicker but if your time is limited then try this one.
If you opt for this project add an element of difficulty – maybe incorporate one or two of the next couple of projects to push yourself.
Project #3 - Shoot Green or Red, Yellow, Blue or Mauve!
Pink works too.
Do this as part of your project 52 except dedicate yourself to subjects with one dominant colour.
Your choice of how you go about it but I would suggest you take photos where the colour is clearly dominant and not just a small part of the photo.
An alternative approach is to take a photo that does NOT have a particular colour in it.
Green or blue are real challenges to leave out.
Still too easy?
Okay then shoot a photo with the same two colours in it every day of the year.
Not as easy as it sounds – believe me.
Remember always the object of the exercise is to improve your photography not to prove you can find a subject with a dominant colour.
Project #4 - Shoot Exclusively in Monochrome
Set your camera to black and white and watch your photography skills take off.
Photography is all about understanding light and the best way to get better at photography is to learn to see light.
Nothing teaches you how to see and understand how light works quite like monochrome photography.
Do this for as long as it takes and for at least a month at a time taking at least 10 different photos in black and white each day.
Thank me later.
Project #5 - A "365" With a Single Subject
Make your “365” (project #1) a bit more challenging and select one subject and shoot that every day for a year.
The most interesting I have ever seen of this is someone who decided to take a photo of their own feet from various angles.
It was a truly amazing collection of shots as it took some incredible imagination and out-of-the-box thinking to keep it interesting.
Project #6 - Technically challenging
The idea here is to choose something you find technically challenging.
This could be anything you struggle with or want to improve on.
Some things that come to mind are:
- backlit photos
- action photos
- long exposures
- multiple in-camera exposures
- night photography
- macro photography
Choose one of these and concentrate on it for 6 months at a time until you can absolutely nail down what you set out to do.
No Excuses - Join groups, take courses, read books, enter competitions, watch videos
The internet is full of resources – take advantage of them.
- I strongly suggest you join your local camera club and enter their monthly competitions. This gets you mixing with other photographers of different skill levels. The more experienced are always willing to help as they were once where you are today. By entering competitions you get feedback from judges – this can be deflating at times but do not take their comments personally and remember all judging is subjective.
- Join an international group with high standards. I joined the Photographers Guild last year and although they are based in the UK they have a ton of international members. The monthly competition is of an extremely high standard. The feedback from the panel of judges is priceless. Not for the timid!
- Join or organize group outings to a specific event or place of interest. My daughter (who has no interest in photography) and I go the annual International Press Awards that come to Auckland once a year.
- Compete against the photographer you were yesterday not against anyone else. Keep improving.
- Join online forums and participate in them. You will find lots of forums dedicated to photography by brand name such as Canon or Nikon. Just like clubs they are a like-minded bunch of people all with the same agenda as you. Get involved in any competitions they run, ask questions -its all free advice.
- Take an online or local night course to learn general or specific genres. For example if your niche is portraits attend a portrait seminar in a town near you.
- Read books and study the masters. The history of photography is fascinating and the equipment our pioneers used was large and cumbersome. These were dedicated men and women who we should still bow to today.
- Today we have so many choices; mirrorless or DSLR, Full Frame or crop-sensor, point and shoot or bridge camera and the list goes on.
- Watch videos – there are thousands on YouTube and Vimeo that will all help you become a better photographer or processor.
- Improve your processing skills – exceptional processing is what turns and average image into a great image. Learn photoshop and get a Wacom Tablet to make things easier.
In fact I highly recommend getting a tablet not only because it makes processing so much faster, easier and better, but also because, once mastered, the skills you learn will set you apart from your peers.
These are just some of the things I can think of off the top of my head. As you can see though, there really are a ton of ways to get better.
The Only Thing Stopping You Getting Better at Photography is You!
I’ve covered everything I can think of to get you to become a better photographer – now its up to you.
Of course, I’m happy to help you with any queries you may have; to this end I invite you to …
post your comments or questions below.
I think it’s a great place to have all my readers participate so don’t be shy.
The questions you have are no doubt the same questions others need answers to.
Let’s hear it from you.


Lawrence, I learned so much while reading your post. I have a photography book on my book shelf that I hardly ever opened. I must admit that I am motivated to look at it again and see what I can learn.
The tips are quite helpful. For someone who is serious about the craft, the resources are plentiful. I like the idea of all the clubs that are out there.
I wish I knew enough about the art to ask you some intelligent questions (lol).
This was a helpful,post for anyone interested in photography.
Hi Monique – what a lovely comment – thank you.
The only way to increase your knowledge is to ask the “stupid” questions – you do of course know the only stupid question is the ones you don’t ask!
Read that book that’s gathering dust and make notes of what you don’t understand or points of interest that you would like to ask questions about. Then feel free to come back here and hit me with those questions.
The really cool thing about questions from others is that I learn a lot too!
Hope to hear from you again.
Lawrence
I found this article very helpful. It as if it was written just for me. I want to take better pictures, but at the same time, I’m afraid to experiment. I love your suggestion of reading about all the different buttons and experimenting with that one button until you fully understand how it works. I also love your idea of posting pictures on Facebook every day or once a week. I think this is something I will do. Thanks for all of your advice.
Hello Wendy.
Thanks for your comments and approval of my little tricks to make things a bit easier.
Oh and I was talking to you. Hahaha.
I think I may write a post for each of the buttons on my camera (Nikon D7100)- do you think that would be useful?
Of course they won’t be in exactly the same as place on other models but they all do the same functions.
So while you take a photo a week and post on Facebook I think I will write a “button” a week and post on the site.
When was the last time you were professionally photographed?
You owe it to yourself and your family as one day they will look for a photo of you – what will they find?
Take care and hope to see you back here sometime.
Lawrence
Lawrence,
Always been into taking pictures. Have never owned a digital camera except on my phone. Still have an old film camera, cost way too much today to play with the settings. I did run a roll of black and white film through it, taking pictures of the moon.
I have taken the same pictures from the same spot before and made videos out of them. You must have a spot to take them from and use the same focus. I am working on one now of a Redbud tree blooming and getting its spring leaves. Several photos a day, stitched together for a video. Have you every tried this before.
John
Hey John,
thanks for your comments – sounds like you have an interesting project on the go.
Yes I have done it before. Modern DSLRs have a built in program to do this sort of thing. It’s called a time lapse photography.
You can also get intervalometers that do the same thing with cameras that don’t have it built in. Haha everything is automated these days!
You should do some of the stars for your blog site – it would be pretty cool.
Appreciate your comments my friend,
Lawrence