Let’s face it a good photograph starts with an in-focus image and I am going to explain some basic concepts and ideas that will get you to take tack sharp photos like a pro – assuming that is the aim of the photo you are taking.
You may not always want everything in frame to be in focus, there are times when you may want a part blurry image to create a feeling of speed or motion or a particular mood (a subject I will cover in another article).
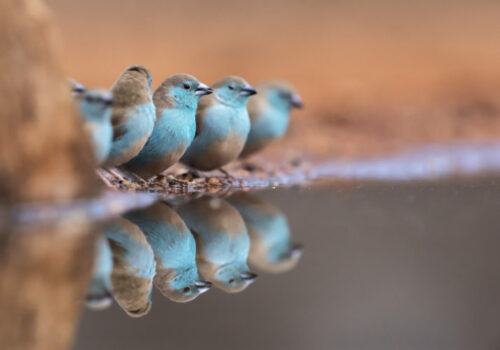
In the photo above (of the Blue Waxbills) only the centre bird is tack-sharp with the others being slightly out-of-focus but still clearly recognisable.
By using a shallow depth-of-field, achieved by selecting a wide aperture of f2.8, I was able to blur (soften) the distracting boulder on the left, have all the birds recognisable and the centre one in sharp focus as the main character in the image.
Looking at the photo I get a feeling that this central bird is the leader of this group and is talking to the rest of them, possibly giving them instructions on safety, before proceeding to drink.
I want to help you understand what the three elements are that will always impact on the sharpness of your images.
- You the photographer
- Your subject
- Your equipment
There’s a lot to cover so let’s get straight into it.
Contents
Improve Your Technique For Sharper Photos
Assuming you have all the settings right in terms of shutter speed ISO and aperture as discussed below your technique is still a very important aspect of taking tack sharp photos. It doesn’t help to have the right gear, the right settings and all the other things if your technique is wrong.
The simple act of pressing the shutter button can result in the slightest of movement at exactly the wrong time, rendering an out of focus image.
With a DSLR camera when you press the shutter button the mirror “slaps” up to allow light in, the aperture opens and the sensor is exposed to light. Camera shake is caused by the slight depression on the shutter release button and the mirror “slap”.
With a mirrorless camera there is no mirror “slap” but this does not guarantee a tack sharp photo as the slight downward pressure, on the shutter release button, is more than enough to cause camera shake.
So what can you do to overcome this?
The good news is that the modern day cameras do, to a certain degree, compensate for the “human” element with the built-in camera-shake stabilizers that many lenses have.
- Nikon call it Vibration Reduction (VR),
- Canon call it Image Stabilisation (IS),
- Tamron call it Vibration Compensation (VC)
- Sigma call it Optical Stabiliser (OS).
They’re all the same thing and are supposed to counter the human movement that is inevitable in every exposure.
 However, that is not the end of the situation as other elements come into play: such as the weight of the lens and camera body, the weather, the terrain etc.
To improve your hand-holding technique do the following:
Holding the camera correctly.
- Hold the camera correctly. Your right hand should be holding the the body of the camera with your finger paused over the shutter release button. Your right hand is the dominant controlling hand.
- Your left hand should be cupped with your left fingers creating the shape of a nest, the tips your fingers should lightly touch the lens which is resting gently on them. If you grip the lens with this left hand there will be tension in your left forearm resulting in camera shake and an out-of-focus image. I cannot stress enough how important this left hand is – it must be as light as a lover’s touch!
Brace yourself when standing!
- Make a tripod out of your arms and body by tucking your elbows firmly into your waist forming a triangle with your arms and torso. Make sure you have no tension in your forearms.
- Plant your left foot in front of your right about shoulder width apart or more if windy or on slope.
- Lean into the shot.
Get down low.

- One of the most effective ways to brace yourself is to get low by either sitting on the ground or lying down.
- When sitting, place your feet wide out in front of your body. Adjust the height of your knees, by moving your feet, until you are in a comfortable position when your elbows are place on your knees. With your eye to the viewfinder you should have a very stable base to shoot off.
- When lying down create a tripod using your elbows set at least shoulder width apart. Make sure you are comfortable and can breathe.
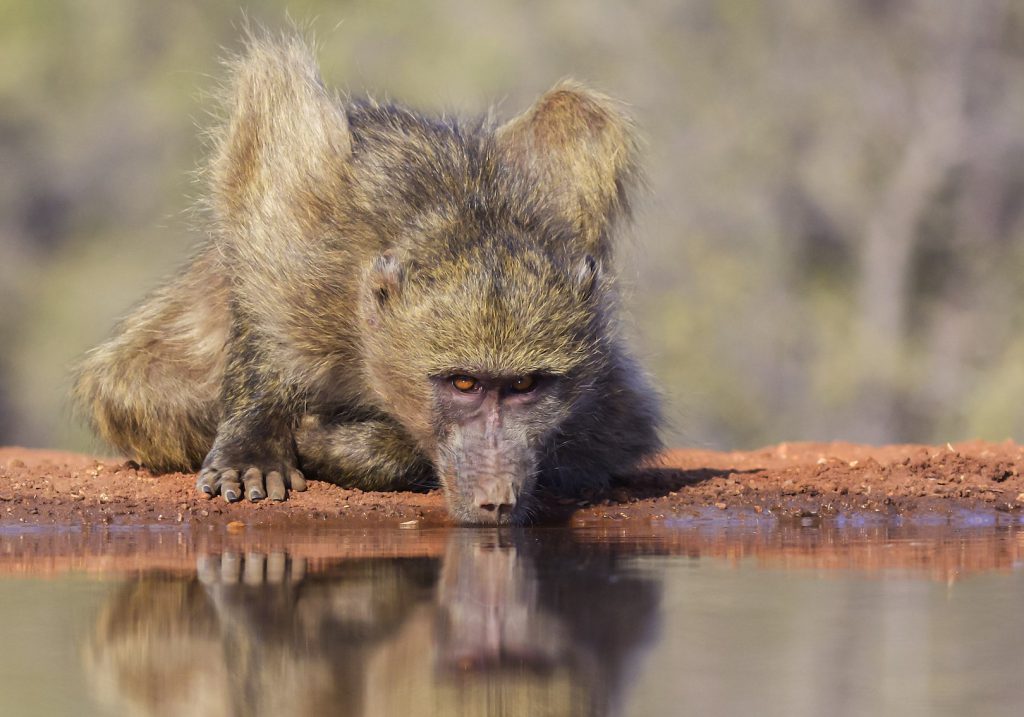
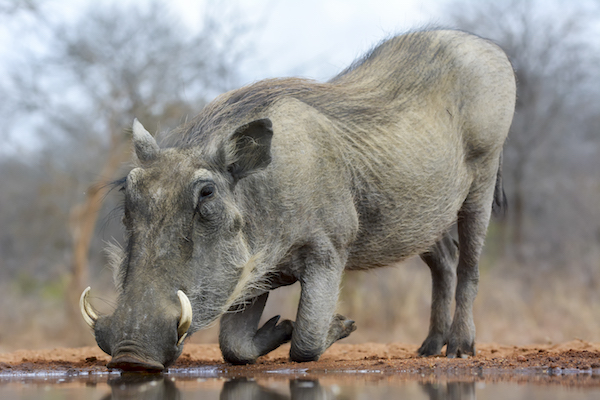
All the photos shown on this page, besides being tack sharp, have impact because in each instance I was at the same level as my subjects.
Use a prop.
- Have a look around and if there is something you can lean on, such as a post, a wall, a vehicle a rail or similar to add additional stability.
- Use a tripod whenever possible.
- Invest in a good monopod – these are especially useful if you are going to be in the same spot taking several photos over a period of time, such as a sport’s event.
Consider (Understand) Your Subject

Subjects can vary from non-moving landscapes to incredibly fast moving animals such as the Honeysucker.
For the former you have the option of using a tripod (I always recommend a tripod for landscape photography) combined with a small aperture for greater depth-of-field and a variety of shutter speeds, dependent on the light.
Every subject will vary and needs to be considered on merit and very much dependent on the end result you are trying to produce.
For tack-sharp photos it is vital you use the correct shutter speed in combination with ISO and aperture to get the desired result. Do a Google search for “The Exposure Triangle” and study it until you understand how each of the three elements, shutter speed, ISO and aperture, effect each other.
Your Gear and Tack Sharp Photos … are they compatible?
Gear can make a difference to your photography, and in particular the sharpness of your images.
Lenses, in particular, play a big part in just how sharp a photo can be.
It has long been acknowledged that “prime” lenses are sharper than zoom lenses.
However, that does not mean you cannot take a well focused image with non-prime lenses; I have seen many award-winning photos taken with the amazing kit lenses that come with the camera.
Not every lens is the same either. You can put two identical lenses on the same body and get a slightly different result despite having identical settings. The reason for this is that each lens has a slightly different sweet spot – the aperture at which that particular lens is absolutely tack sharp.
- A lot of prime lenses are sharpest when they are 1 or 2 stops away from there widest.
- Zoom lenses are often at their sharpest at a particular aperture and focal length, not necessarily the longest focal length or the widest aperture.
Your camera’s capabilities can also impact on the sharpness of your photos in as much as some bodies can shoot at much faster shutter speeds and have sensors that produce wonderful photos at very high ISO.
The faster your shutter speed the more chance you have of freezing fast moving subjects such as the little Honeysucker mentioned above whose wings move at a truly amazing speed.

The combined weight of your camera and lens will impact on your ability to hold the camera still.
The bigger DSLR bodies can weigh a fair bit and when coupled with a longer lens it can weigh a ton! This means a far greater chance of camera shake.
The general rule of thumb is use a shutter speed of at least 1.5 times the longest focal length of the lens. A 70-300 mm lens will then need a shutter speed of at least 1/450 second (300 x 1.5) or faster. But this rule of thumb does not take into account the fact that prime lenses are way heavier than other lenses so I tend to use this rule … like never, and prefer to know my hand holding capabilities.
Of course if you need a slower shutter speed, to create the image you want or to get the correct exposure, you will need to use a tripod, monopod or some other method of providing a stable base.
If it’s been a long day and you’ve been carting your camera and gear around all day your ability to keep a steady hand will diminish. You may feel OK but your body will be fatigued and you may wonder why your last few photos are soft – the probable reason will be fatigue.
To overcome this, consider investing in a good tripod (or a gym subscription!). Jokes aside though if you have lots of long days out in the field your camera fitness will definitely improve.
What to Focus On For Really Sharp Photos … the critical focal point.
Another common question I see and am asked is what to focus on.
For live species, humans and animals, always the eye and always the eye nearest the camera.
When viewing a portrait of an animal or human we are naturally drawn to the eyes so make this your focal point.

Be aware that if you focus and recompose there may well be a shift in the plane of your camera relative to your subject. This can impact on the sharpness of the image dependent also on the aperture setting you have used, remember aperture determines the depth of field.
For landscapes you generally want everything in focus so choose a small aperture (large f-stop) of at least f16 and focus on a point 1/3rd of the way into the frame.
For other still life images select your point of interest and focus on that. Select the aperture you want depending on how much depth of field you are trying to obtain.
For fast moving subjects try to get as much of the subject in focus as possible – this can be achieved by setting the required number of focus points available with your particular camera body. The more expensive models have more focus points than the lower priced models. On my Nikon D7100 I use 21 focus points for birds in flight and similar fast moving subjects.
The best way to learn is to go out into the field and practice with a view to understanding your own limitations first, and improving on them, once you know your limitations then, and only then, should you start looking at upgrading your equipment.
Putting it All Together and Producing Tack Sharp Photos
I hope this has helped you to understand the likely reasons why your images may not be tack sharp and more importantly helped you understand what to look for and concentrate on.
Some ideas you may want to consider trying …
- Take on a “365 challenge” whereby you commit to taking at least one image each day and posting it online. It has to be a new image everyday taken on that day, regardless of anything else. When I did it I took the process a step further within myself and tried to produce an image every day that was better than the previous day’s effort. The improvement in my photography was very noticeable and handling my camera every day made me very familiar with the settings and menus.
- There are other alternatives to this idea. Do at least 1 photo a week. Shoot using one lens only (this is a great way to learn the lens intricacies).
- Join your local camera club and enter the monthly competitions. These local and national competitions are a great way to receive genuine critique on your photos and the first thing all judges consider is how sharp the image is. Facebook is great for your ego as all your friends will “like” your photos but they really don’t mean anything other than your friends are encouraging you. That is of course great but even an out-of-focus image will get a “like” and will not motivate you to improve your skills.
- Put your money where your mouth is and print the best photo you take each month. When I am paying money I find it increases my concentration very dramatically!
- Practice, practice and practice some more – but always with a purpose.
Remember it’s all about focus to get out there and concentrate on taking tack-sharp images by shooting, experimenting with settings and different lenses and making notes.
TIP – focus!
And finally if there are any questions or any particular aspect of your photography that you want me to help with I will do my best if you …
leave a comment below.
I am also very open to suggestions and further tips that will help fellow photographers.
This has to be a photographers bible on taking great sharply focused photos. The techniques that the are describing i bet a lot of us don’t practice or know about. The average person would not think about holding the camera properly, finely focusing etc.. I usually just point and click , rather amateurish compared to your standard.
A well put together lesson . Thank you.
Hi Andrew. Thanks for your comments. Yes sadly as good as the modern cameras are, even those phone, cameras, photography has a lot of finer points that do require practice to give them that WOW factor.
I’m sure your photos are fine though?
For a lot of folk a few likes and comments on FaceBook is all they want and as far as I am concerned that is perfectly fine as they are getting out there and taking photos.
Keep pointing and clicking my friend and remember to print the good memorable ones.
Awesome pictures, I like that you were actually there taking the pictures, that’s incredible. Your site is simple but tastefully done, and your pictures show your love for the animals, I think that is great. I love animals and it was very nice to see them portrayed so respectfully. I also like that your site is like a tutorial resource for people that are interested in photography to go to. I think you did a fabulous job. I would also like to know where you traveled to take such wonderful pictures. I’d to hear from you.
Great Work!
Thanks Shoshanah. These were taken in the Sabi Sands Game Reserve area in South Africa in September 2017. It was a fabulous holiday – definitely a once in a lifetime.
As I am a photographer I intend taking all the photos I use on my site – at least I know they will be original.
Are you a photographer?
I’d love to hear your story
Wow first of all your photos are fabulous. I love the first one with the cheetah it just looks so dreamy. It’s beautiful.
Whilst reading through this blog I never actually realised how much needs to be done taking a real good photo you have really opened my eyes.
I do take terrible photos too.
Can I ask you is the first one for sale. I just love the cheetah one.
It just looks like its velvety. Like its as soft as the cats Fur. Does that sound silly. Its the only way I can explain How fabulous it looks.
This website is awesome please let me know if I can purchase any of your photos.
My kindest Regards Debs 😉
Hi Debs. Thank you so much for your kind words. The ‘cheetah’ you refer to is in fact a leopard. They look similar but the leopard is a much larger cat and the cheetah has two black lines coming down from the eyes – they look like tears. Both are beautiful animals though.
The leopard photo did very well in an International competition based out of the UK coming in the top 12 of it’s category out of over 13000 images.
Yes it is for sale. If you let me know what size you would like it in and on what format; canvas or print you would like I could work out a price for you. It looks gorgeous printed large!
Thanks once again for stopping by.
Lawrence
I’ve taken my fair share of out of focus photographs. This was a good read to discover. My sister has a camera with shake reduction of some kind, and she tends to take better pictures than me that are much more in focus. I got a tripod to help compensate and it helps a lot, but not having to use one is an amazing thing. I definitely learned some good things from this.
Hi Avareth.
Nice to hear you and your sister are both keen on photography.
Shake reduction can help a lot with getting tack sharp images as can a tripod.
Also try increasing your shutter speed and your ISO.And practice, practice using the right techniques such as how you hold the camera.
Thanks for stopping in and commenting – I love to hear from my readers.
Lawrence
More great advice! Just wish it wasn’t quite so wet at the moment. Gettng down on the ground has more appeal when you are not about to be engulfed by a foot of mud!
Haha indeed but when the going gets tough the great photographers get down and dirty!
Its only dirt 🙂
Why not go out one day with the absolute intent of getting into horrible positions to take that one great photo?
And then share both the story and the results.
Oh and thanks so much for all your comments.
Ha! I will do it! Make it a fun and dirty experience without giving a care to what kind of mess I get in. Thanks for giving me a nudge!
LOL – be sure to take selfies and share on social media.
🙂 🙂 🙂
Lawrence
Hi Lawrence, I love your website as it really is full of all the information a photographer could possibly need. This post especially, is useful to a novice like me as my pics are often blurred and I have no idea about positions and shutter speed etc.
I’m mind blown by how much there is to learn and find it all so fascinating, and the fact that we have such super technology now means we can get the best photographs possible.
Thanks for creating this great website and I will surely be returning 🙂
Hi Stefanie (again) 🙂
You are too kind but yes we can all now take decent photos with the technology we have. But having a great oven does not make one a good baker – you still need to learn how to operate the thing and of course what ingredients to combine. A silly analogy but photography and most other subjects are similar.
Actually I have a funny quote about something along these lines – I might post it and write an article on it just for fun
thanks for your kind words once again
I hope this is not considered a blasphemous question, but do you have any tips for taking better photos with an iPhone? I take so many pictures with my phone and my kids are always complaining about the quality.
Btw, I love your photos of the animals in Africa. Brings back a lot of memories.
Bwahaha Diggie – OK my Son a few “Hail Marys” from you should keep you out of an eternal place where there are no cameras!
iPhones all take brilliant photos these days and I have seen award winning images taken with them.
I would suggest you learn a few basic rules of photography but bear in mind they are not cast in stone and it is often a good idea to break them – provided you know why you are breaking them. I would start with the most common one which is “Rule of Thirds“. If you click through to that site you will find other rules that will help you too.
Also always “look in the corners of your viewfinder” – or in other words, eliminate what is in the photo that is detracting from the main image. Keep your viewers focused on what you want them to focus on.
Hope that helps and thank you for your comments.
PS Can I interest you in a “real Camera”? 😉
I’m too lazy to carry a real camera around with me.
I guess that is the same with most of us.
Oh well I tried.