Let’s talk about manual mode in photography – seen as everyone says you’re never going to be a photographer until you learn to use your manual settings.
Why does everyone say this?
If you have a DSLR camera and are not shooting in one of the manual mode options you are not getting the most out of your camera!
There are three “manual” modes available with DSLR cameras. These are:
- Manual (my preferred option)
- Aperture
- Shutter
Let’s see if I can get you off auto and into one of these manual modes so that you take control of the camera and learn to take excellent photographs.
In this post I am unashamedly going to promote using the full manual mode which is what I use 99.99% of the time. The other two manual modes are a bit more automated but are still way better than auto in terms of you taking control of your camera.
Contents
Without light There is nothing To Photograph ... or see
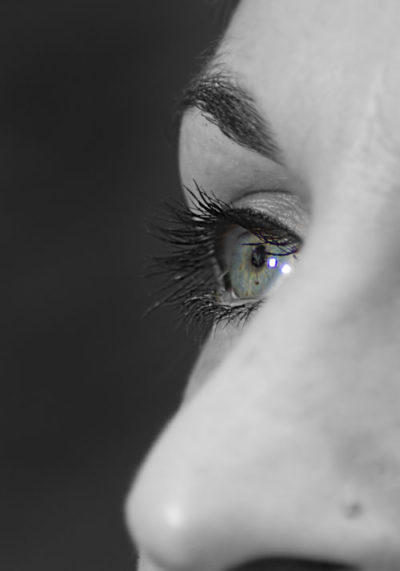
A camera body is a receptacle for receiving information, in the form of reflected light, and recording it on a sensor. This is how eyes work in conjunction with the brain.
The eye sees light reflecting off objects and transmits that information to our brain.
Without light there is no image – there is nothing to see.
The image that reaches your brain (the sensor) does so through your eyes (the lens) via your pupils (the aperture) and is exposed for a certain length of time by your eyelid (the shutter).
Unlike a camera our eyelids remain mostly open and hence we see a moving world – exactly the same way a video or movie camera works.
Whilst our eyes are sensitive to light and adapt by expanding or contracting the pupil (aperture), as the case may be, our brain (sensor) is a pretty amazing bit of matter and can analyse almost anything we throw at it.
To replicate this in a camera has so far proved impossible and the closest we have come to it is by producing a sensor with variable processing speeds – this is what is known in photography terms as ISO.
We only ever blink to protect our eyes (against bright light, dust, wind, water and other foreign matter), to lubricate and clean them and rest them (when we sleep or just want to shut off for a wee while).
Introducing "The exposure Triangle" - duh duh!
Note: The “duh duh” above is supposed to sound like the sound track of a dramatic movie – did it work for you? 🙂
The three elements that make up the Exposure Triangle are ISO, Shutter Speed and Aperture and it helps to understand the role that each plays in photography:
- ISO. I wrote a previous post which you can read by clicking here. So as not to repeat myself the ISO is a sensitivity rating that determines how much light the sensor needs to record an image. In other words how much time the “brain” needs to analyse and record what it just saw. The higher the ISO the faster the sensor will record but if exposed for too long it will be over-exposed and nothing will be recorded, while too short a time will result in lost detail or potentially an out of focus photo due to camera shake (unless of course you are using a tripod).
The lower the ISO the more time the sensor needs to be exposed but the reward is far more fine detail in the image. - Shutter Speed. This determines how long the aperture will be opened to allow the light to pass through to the sensor. Think of it as a blinking of the eyelid. Obviously the slower the shutter speed the longer the sensor will be exposed to light.
It is the shutter speed that determines how much of the action will be frozen or if the photo will be out of focus. See my post on taking tack-sharp photos. - The Aperture is the size of the opening allowing the light in. I like to think of it as a window in a room – the bigger the window the greater the amount of light allowed in while a small window only lets a small amount of light in.
The aperture plays a second, and vitally important, role in determining the depth of field of the photo. Depth of field of a photo is the part of the image that will be in focus immediately in front of your primary subject and how far beyond the subject sharp focus extends.
Aperture sizes (openings) are designated by rather strange system of numbering called “f-stops” and you can read more about this and how it all works in this post.

The important thing to understand is that each of these three elements impacts on the other two.
In simple terms if you are taking a high speed sports photo you will need a very fast shutter speed to freeze the action. If you have a fast shutter speed you will need a lot of light to enter in a small amount of time. You will probably need a big window (aperture) and a highly sensitive sensor (higher ISO) because there is very little time to record the image.
If you use too big a window you may end up not having everything you want in focus because the depth of field will be too shallow. The solution is to use a smaller window (bigger f-stop number) in combination with an even higher ISO (sensor sensitivity).
If this all sounds a little daunting to you right now don’t worry it will all become second nature with a little practice.
What is important is that you understand that these 3 elements combined go to make up the “exposure triangle” – at first it may seem like the Bermuda triangle but is no where near as dangerous and once understood, and applied, you will be well on your way to becoming a way better photographer.
NOTE: Adjusting one of these settings changes the light entering the camera. If you want the same amount of light you need to adjust one of the other two to compensate.
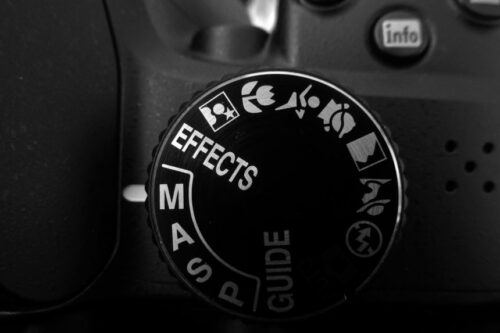
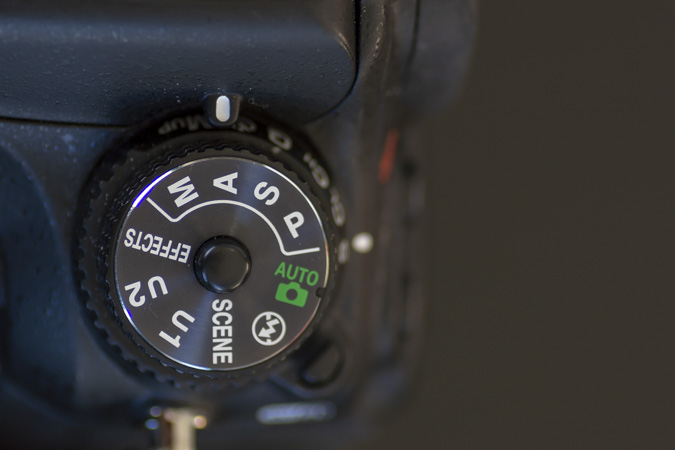
What Do You Want to Prioritise?
The word is your oyster and you get to choose.
- M – in “Manual” mode you control all three and tell the camera what to do.
- S – in “Shutter” mode you control the shutter speed as this would be your priority and the camera selects the ISO and aperture for you. You are, of course, able to override these if you want but as you change one of them so the other one will automatically change. If you increase the aperture, for example, the ISO will become less sensitive and vice versa.
- A – in “Aperture” mode you decide the depth of field you want as this would be your priority. The camera will adjust the shutter and the ISO accordingly. Again you can override either one. For example you may want a particular DoF but don’t want a slow shutter speed for a fast moving subject. Up the shutter speed accordingly and accept that the ISO will go up and you may have a grainy or noisy image.
The trick is of course in deciding what it is that is of primary importance to you and knowing what mode to shoot in – this will invariably produce the best photo in every case.
There will be times when you may have to sacrifice something to get the best shot – this scenario will usually occur in low light situations that your particular camera is not capable of competing with (and about the time you start thinking there is something wrong with your gear and you need an upgrade). 🙂
Getting The Results You Want With Manual Mode
The reason I prefer full manual mode over any of the others is because I like to control both my shutter speed and my depth of field in my images. They can be controlled in both aperture and shutter mode too – I am more accustomed to using full manual mode.
I feel these are the two most important features for my photos and I am quite happy to have a bit of noise that can be minimized in post processing if required.
I have a small confession to make here – I often set my ISO higher than required simply because my camera is great up to ISO 1600 and good up to ISO 3200. By setting it high I have more latitude with the shutter and aperture settings- my two priorities.
Test your camera to determine the upper end of the ideal ISO range – I think you will be pleasantly surprised. I known when I tested mine it was wonderful to discover I could go several stops higher than ISO 200.
To give you an idea of what impact this has – increasing your ISO by just one stop – say ISO 200 to ISO 400, you can use a shutter speed of 1/8000th as opposed to 1/4000th. I think that is HUGE!
Accepting Limitations - they happen
Occasionally you will find yourself in a situation where not even manual is going to give you a good shot.
There could be a number of reasons for this:
- There is not enough light. No matter what setting you use there just isn’t enough light or there is too much light. Both can happen. For the former you will need artificial lighting and for the latter some sort of filter.
- Your camera isn’t capable of a fast enough shutter speed or has a limiting ISO range. Time for an upgrade?
- The lens you are using does not have a wide enough aperture to let in more light. And suddenly you discover why we all spend our money on “fast glass” and prime lenses.
Don’t beat yourself up in these situations. Accept what is and enjoy the scene with your eyes – this can be very rewarding indeed.
Putting It All Together
I hope this has helped you understand a bit more that the manual modes are there to maximize the potential of your skills by using the features in your DSLR.
I suggest you take each of the manual modes out for a test drive and see which one you like the most.
And then get back to me in the comments below – I’d love to hear what you discovered.
And if you already shoot in one of the manual mode options I’d like to hear from you too. Tell me which mode you prefer and why.
Let’s talk photography and share our tips and techniques.
When I first got the photography bug some 3 decades ago, the cameras I was using were SLRs built in the 1960s, so they were completely manual. Of course, back then we shot photos on film, a limited resource that allowed you to take 24 or 36 photos. So you had to pick and choose what you wanted to photograph. It also meant you put a lot more thought into how your were going to photograph your subject.
These days, cameras do a lot of the hard work for you and most people just use point and shoot. No professional photographer uses point and shoot though. They take time to frame a shot, decide what exposure and depth of field they want and picture the final image in their head even before they click the shutter button.
I guess I’ve become a little lazy as I tend to shoot most of my photos in Aperture mode these days rather than Manual. Depth of field is most important to me (I do lot of landscape photography). But every photographer should be aware of the options their cameras provide and choose the best one for the photo at hand rather than letting the camera decide how the photo should look.
Ahhh … another old school man.
I miss those days when the excitement of waiting for your printed photos was almost too much to bare. And then to discover the mistakes (of which mine were many) and start all over again. Using proper money to learn from one’s mistakes was much more motivational than being able to delete photos as you took them.
Sign of the times I suppose.
by the way Gary there is nothing wrong with Aperture priority it is widely used by some big names in photography and for very valid reasons but as you so rightly say there isn’t a professional worth the title that uses an auto mode.
As always, my friend, thanks for your comments.
Lawrence